
Developing Colour Film at Home
What do I know?
I learnt how to develop film in a darkroom nearly twenty years ago. I’ve developed hundreds of rolls since then, for myself and for others, and I’ve made lots and lots and lots of mistakes. By now, though, I have it down to a pretty neat and tidy science and I’m always trying to convince others that it’s not nearly as difficult as your imagination is telling you, and nowadays the chemicals have been stripped of most of the horror elements like formaldehyde. I do not have a darkroom at my disposal any longer, and I’m not all that pressed about it, a dark bag works just fine. Honestly, using a windowless bathroom with your back to the closed door isn’t an impossible compromise.
If you strive for absolute perfection (darkroom quality development and analogue prints) my way isn’t going to make your vision come true. But, if you want to take colour photos on analogue film and then be a part of the process of making those images come to life, I’m here for you.
If this all seems too much still, but you’ve got that urge in yourself to work with film anyway, shooting on black and white film is going to be even easier to develop. No temperature control (okay, limited temperature control), and it can even be done with a mixture of instant coffee and washing powder! No other chemical kits necessary. That’s something I’ll post about in the future, but I know there’s many others who have instructions out there.
If you’re still nervous about working with dark bags, tanks, timers, and liquids, and yet still really have that pull towards analogue, I suggest instant film. That fujifilm instax gaff is a lot of fun, but you can even keep vintage and modern mixed together by finding a used Polaroid One Step and buying the still-Polaroid-manufactured 600 film! Regardless of where you are on the scale of nervousness for film development, I suggest doing this because the more people who do the less likely it is that the film will cease manufacture. My heart is still broken by what happened with FPC-100.
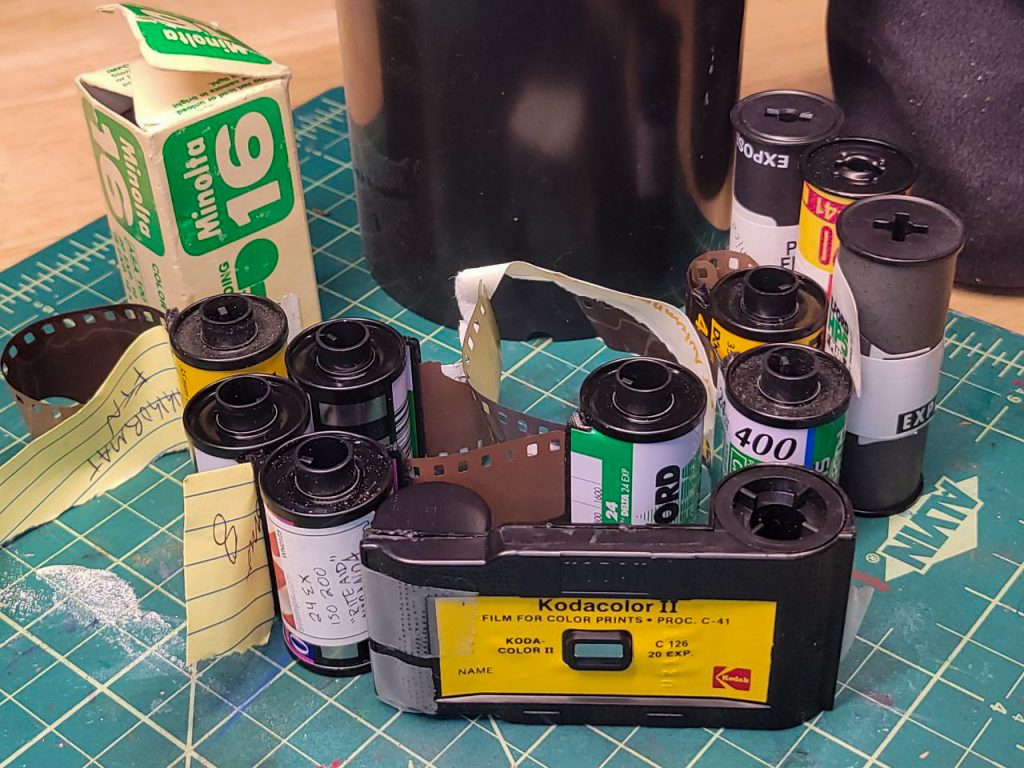
This is what I’m developing in this post (except for the Kodacolor, which was empty, so that was a waste.) That old Minolta 16 roll is from 1978, so see more about developing that half-a-century old film here.
The Supplies
Scroll for more detail about each item, or click to skip to the process.
- Dark Bag
- Film Tank
- C41 Kit
- Beakers and Funnel
- Thermometer
- Sous-vide
- Jugs
- Big Container
- Timer
- Something to hang the film on
- Film squeegee
- Photoflo
- Film negative holders
- A marker that writes on plastic
- Scissors
Dark Bag
A fantastic little invention, which will take getting used to, but which will save you all that cordoning off of a dark space. Best advice my professor ever gave me was to close your eyes as you’re finagling the film inside that bag. Sure, you’re in a lit room, but closing your eyes gets your whole entire brain in the groove that you’re feeling your way through this mess.
Inside this dark bag, you need to have even more supplies, and make sure you have it all before you open up that film canister. You need a bottle opener (if you rewound your film all the way into the canister), scissors, and a film tank (all the parts of it, not just the spool).
Film Tank

Mine is plastic and accepts adjustable spools to take 120 or 35mm film. I’ve modified another to take 110 film. The metal ones are viable as well, I used that sort throughout my schooling, but I find the plastic ones are easier to use.
C41 Kit
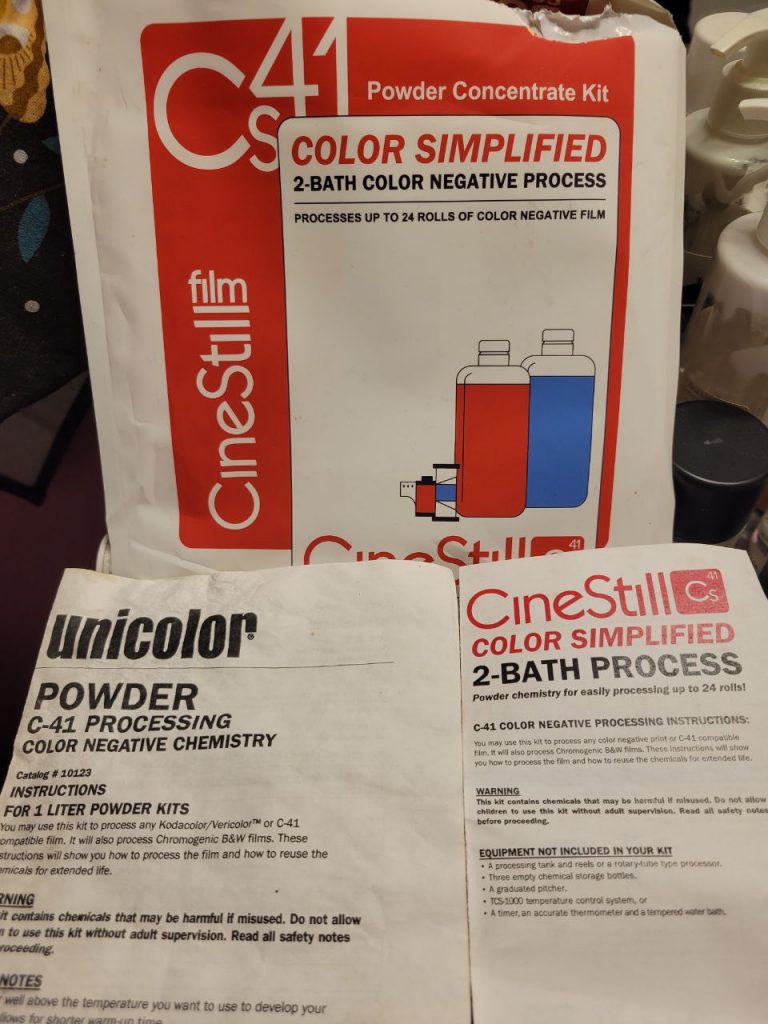
A C41 kit has everything you need in terms of chemicals. You mix this stuff up and can get through about 15 rolls with the batch. It doesn’t keep forever after it’s mixed, which is why I always develop in batches. Note: I usually buy Unicolor, but I got Cinestill brand most recently and there was no stabiliser included. This is absolutely fine for modern film, but if you are developing old rolls of film like I am, it’s best you get the kit with the stabiliser (Cinestill sells a kit like that as well as Unicolor), or buy a bottle separately.
Beakers and a Funnel
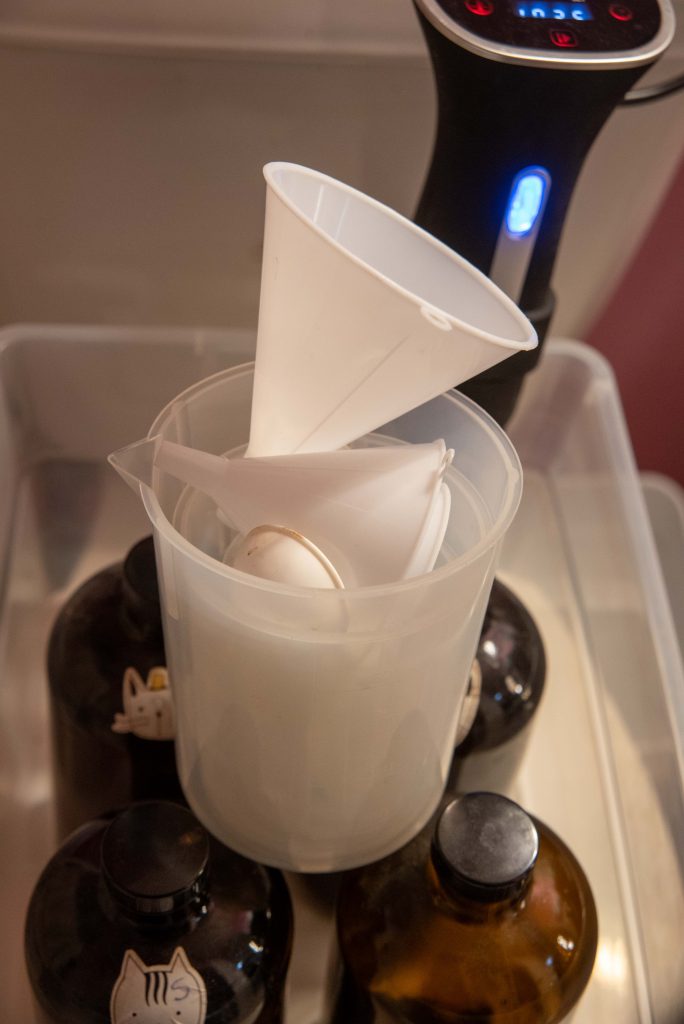
Two beakers needed, at least one of them holding 1 litre. Get a funnel that fits the opening of your jugs. These items, by the way, shall only ever be used for film developing, never anything else. I know I have a collection of them in the photo, but I use only two beakers and the biggest funnel for this process.
Thermometer
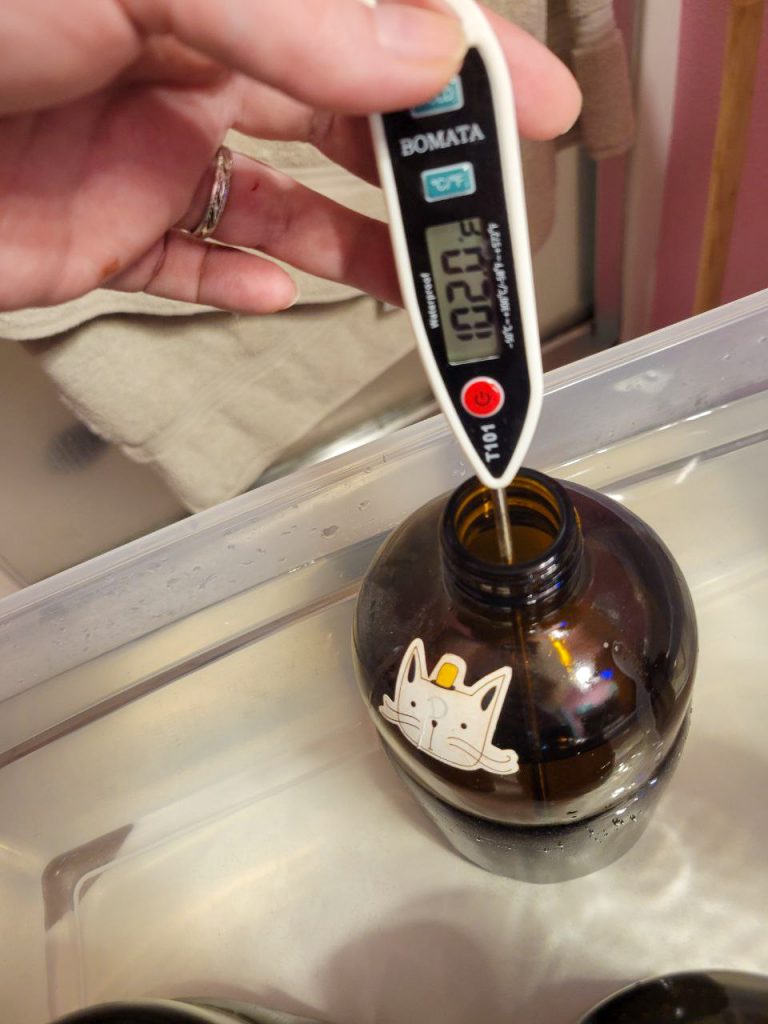
Make sure it’s waterproof. I have ruined 5 of these by dropping them into the liquid accidentally. Really, don’t be like me, just get the nicest one you can afford, it’s important.
Sous-vide
Listen, don’t argue with me about this one. It’s not optional, you will not be able to keep the temperature accurate through wizardry and hope, and the biggest pain about developing colour film is the temperature control. This tool will be the best salve you can get for that pain.
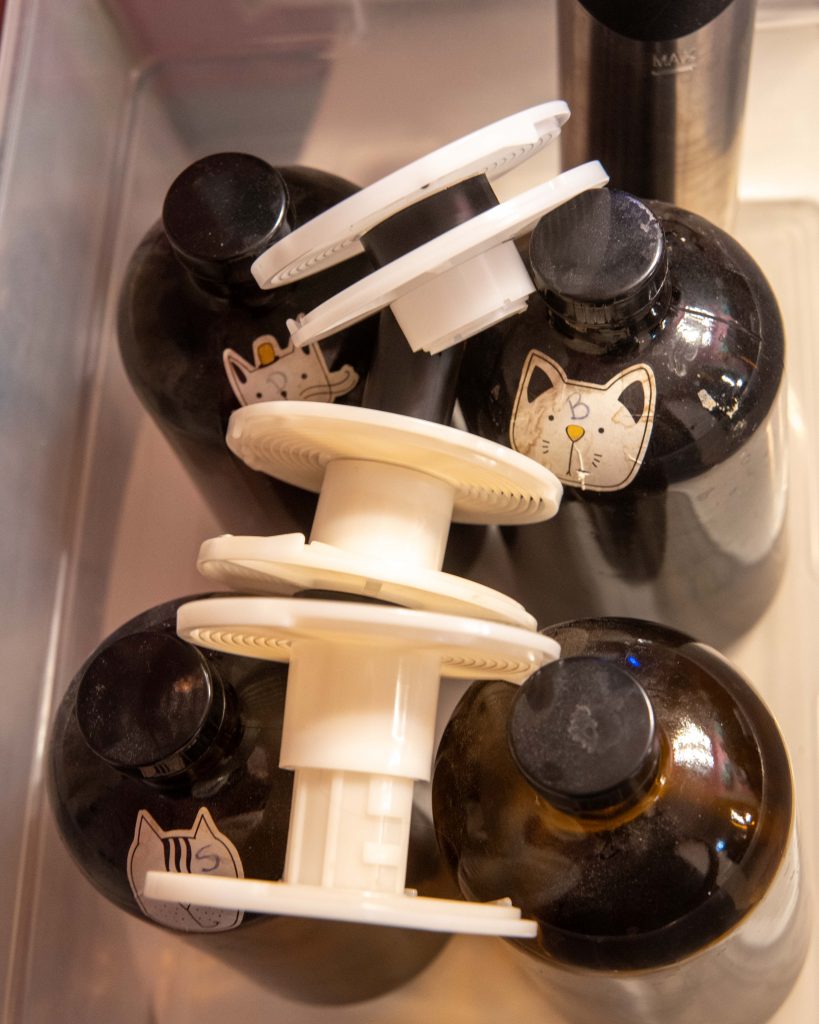
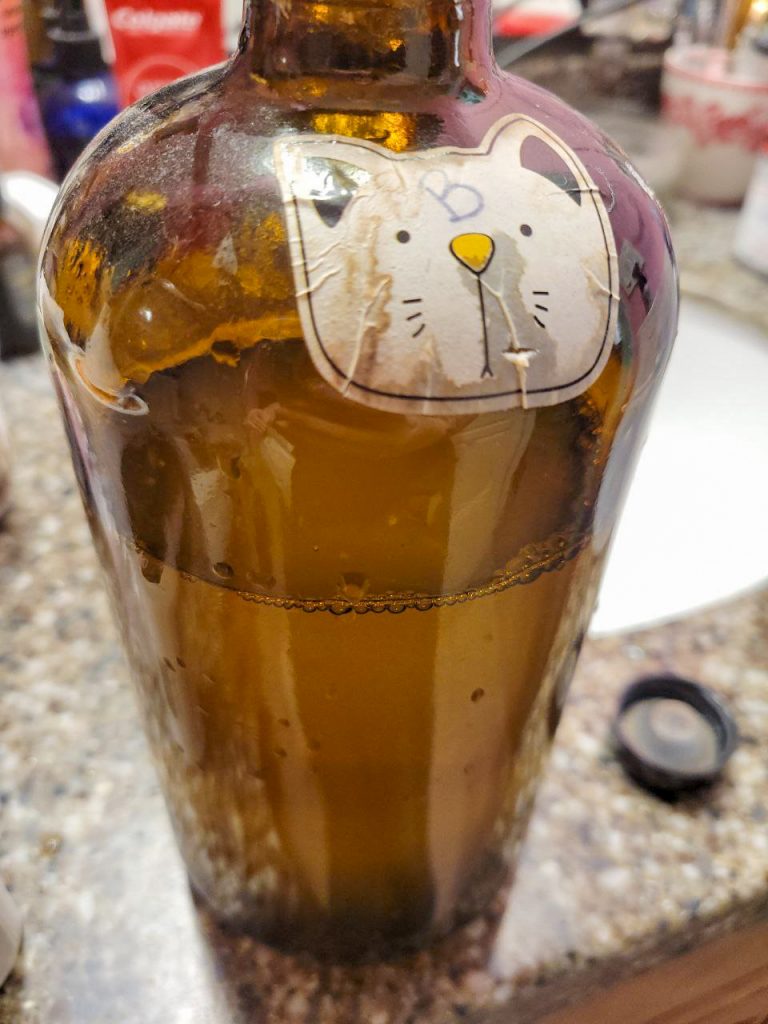
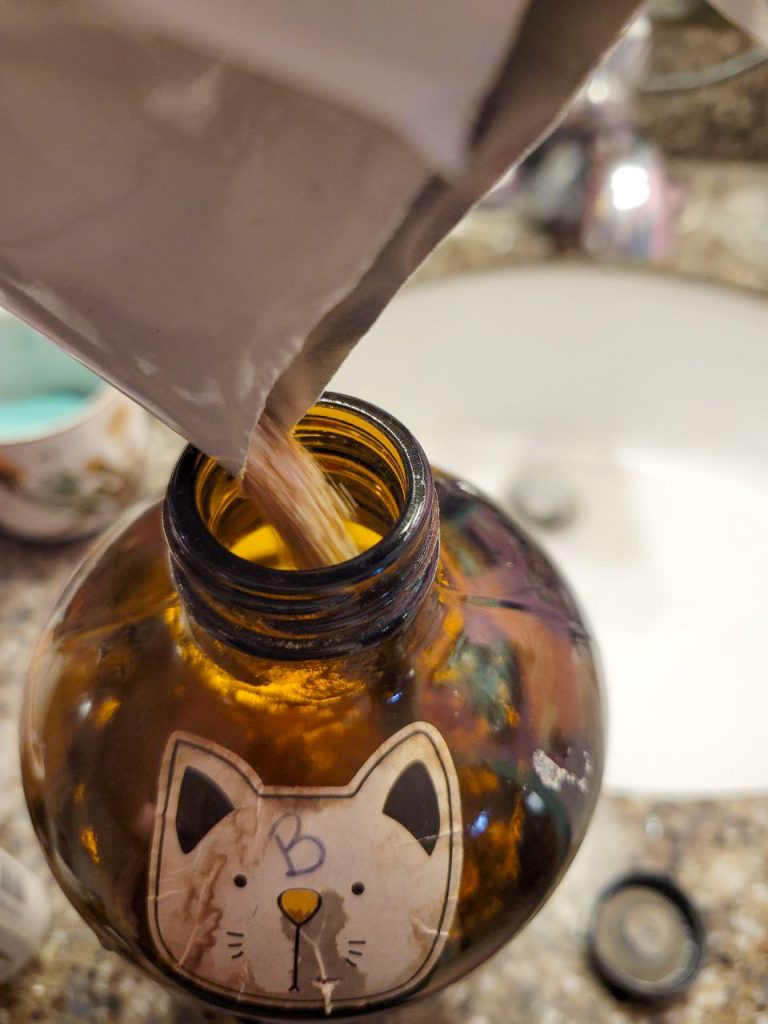
Jugs
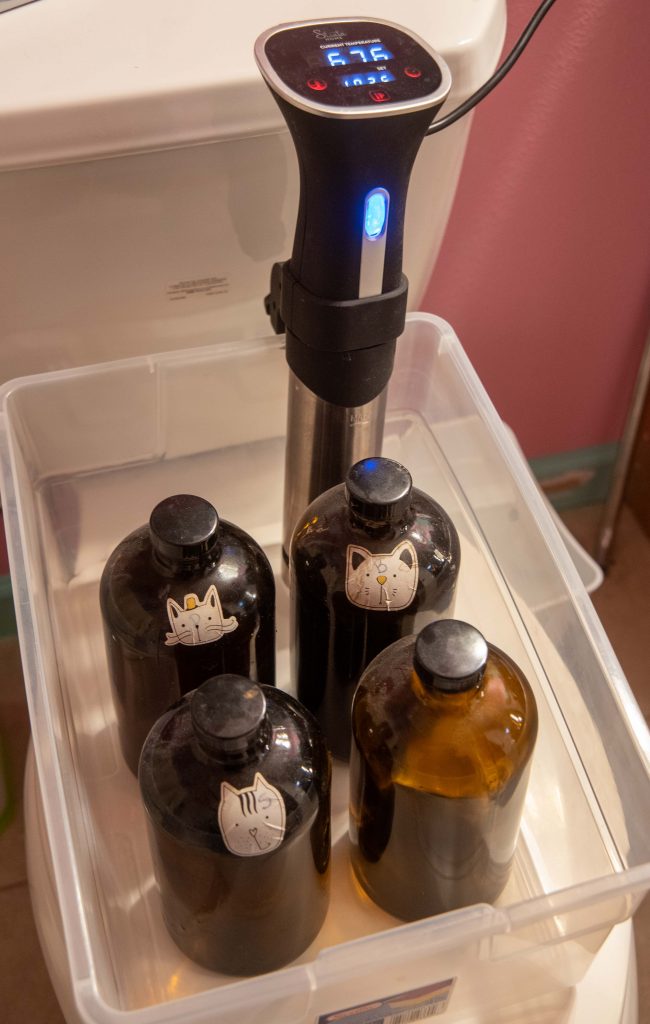
I use the big amber glass ones, some people swear by the accordion plastic ones because you can get all the air out. As I said, I use my chemicals up pretty much all in one go, so I’m not concerned about the air. If you are, there’s your answer. You need three of them if you’re using stabiliser (one for Developer, one for Blix, and one for Stabiliser), and a fourth for water. Developer, Blix, and Water shall go into the bath with the sous-vide, the stabiliser is room temperature.
Big Container
This is a thing you will fill with water and submerge your sous-vide and bottles into. So it must fit all those things. The higher up the water goes, the more uniform your temperature will be. I don’t think the material of this container matters, just the size and waterproofness. I have a plastic tote.
Timer
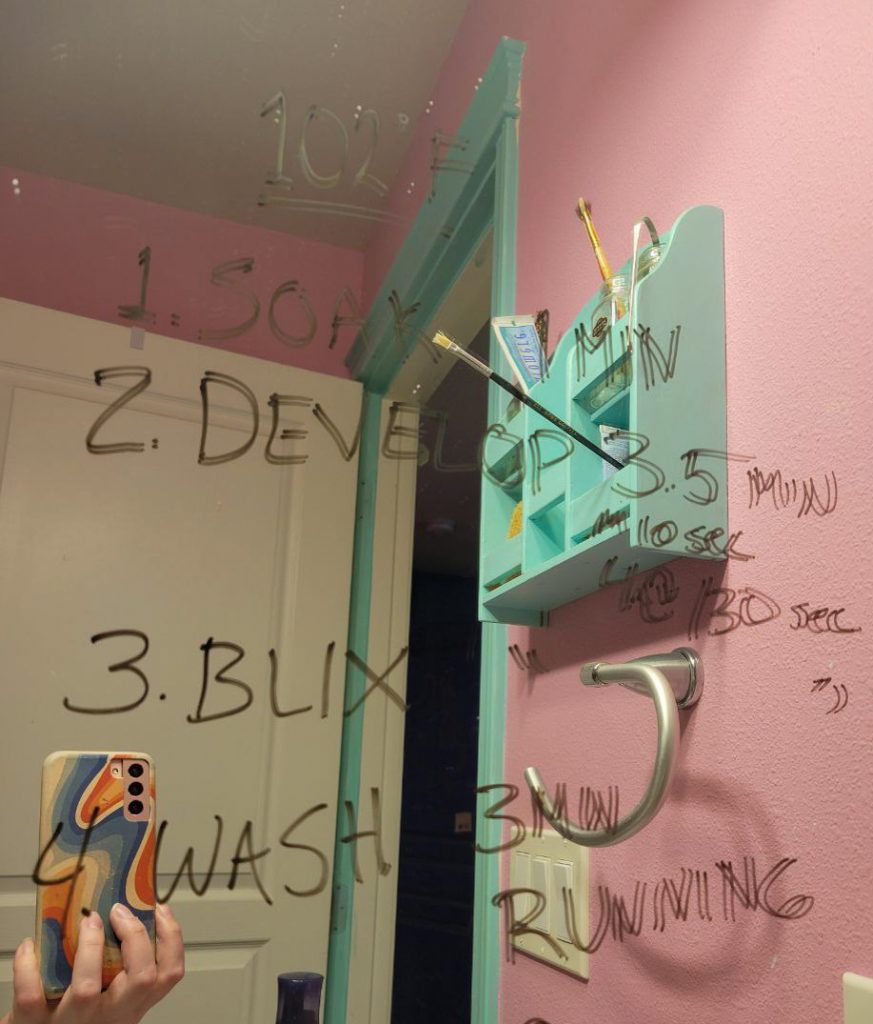
Sure, you can use your phone’s timer. You can also buy a fancy timer. I don’t suggest doing it by counting unless you are a professional drummer. I also like to write the times and temperatures on the mirror just so that I’m sure I know what I’m doing.
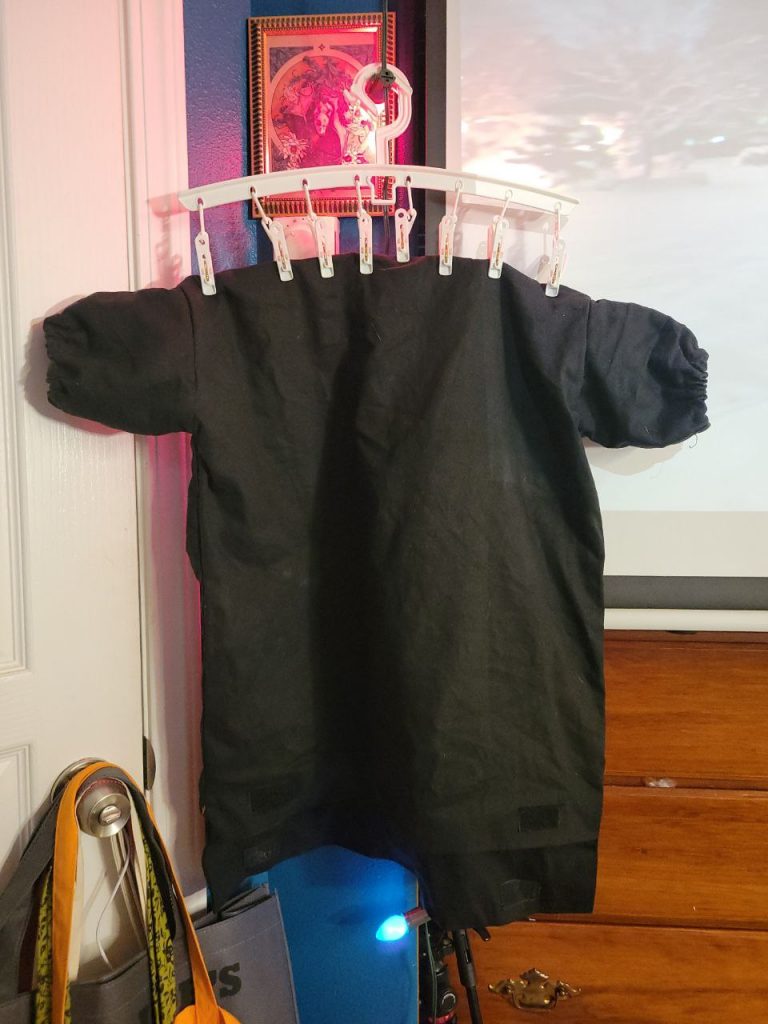
Something to Hang the Film from
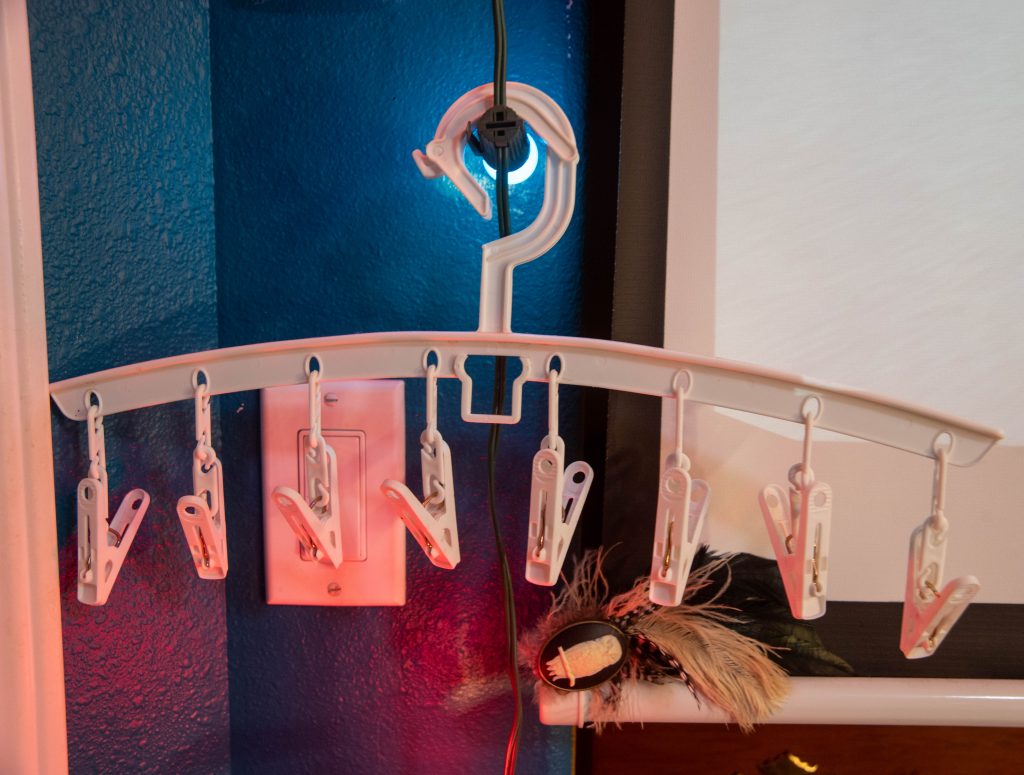
I use plastic hangers with little clips on them. The film must hang straight down and not touch anything else (especially not the other strips of film, that will ruin all the hard work you’ve done in an instant).
Film Squeegee
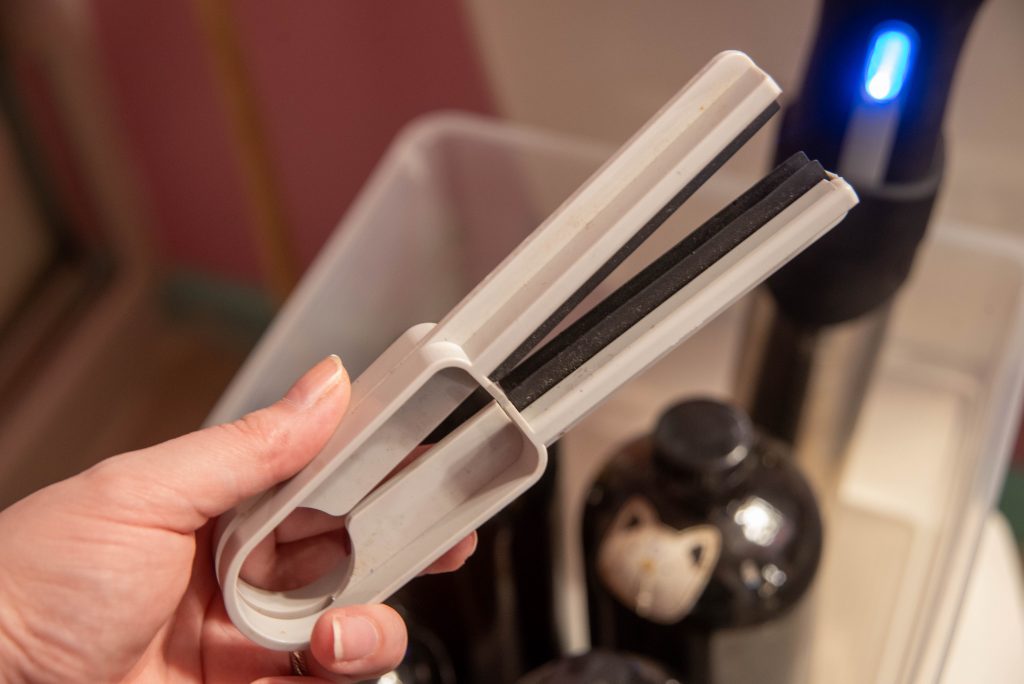
Also not optional. You think it’s optional (I thought so too), but you must trust me, water spots take forever to edit out on the computer. The squeegee motion takes three seconds. (Keeping the film away from dust while it’s drying is a completely separate issue, but this will get you half way to clean scans).
Photoflo
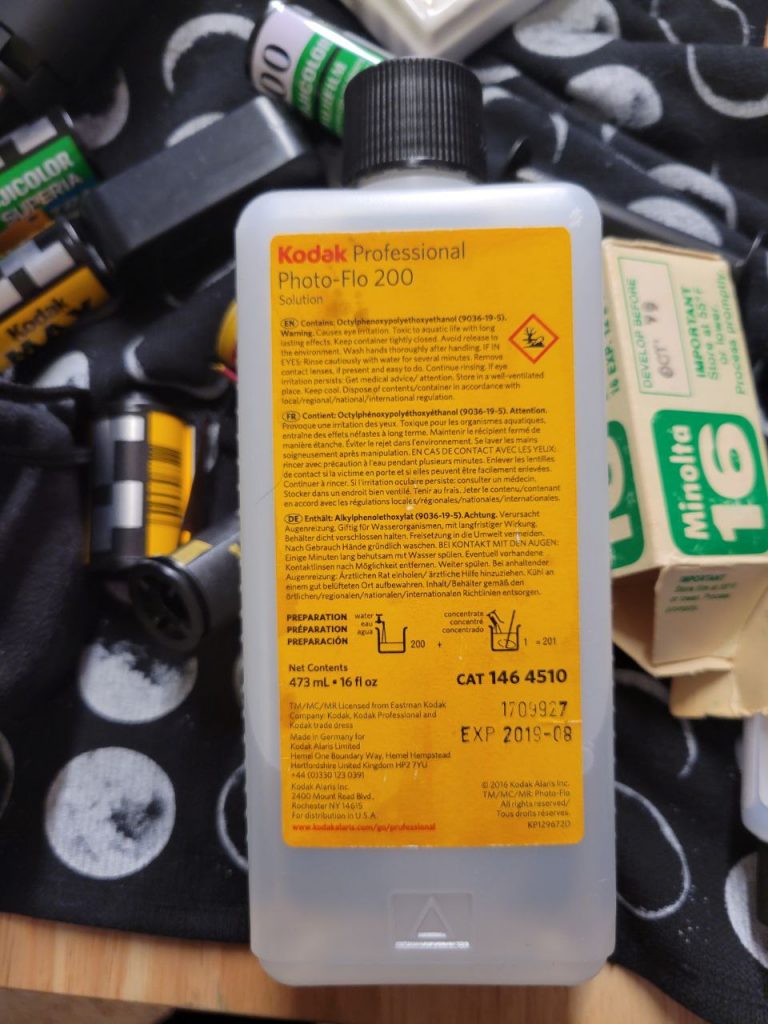
This one is actually optional, but I won’t lie, it’s worth it. I have done all sorts of things with it. Add it to the wash stage, add it after the wash stage, or, if I’m going to be honest, just mixing it up in a beaker and dipping my squeegee in it before squeegeeing and letting it dry.
Film Negative Holders


Yes, I too tried to DIY these with a sewing machine and an old stack of sheet protectors. Get the ones made for film, this is just like the film squeegee. Though, okay, fair, I never can find them for 16mm or 120. I do still sew those ones.
A Marker that Writes on Plastic, and Scissors
Ultra fine Sharpie is what I go for. Seems like a silly thing to put on this list until you don’t have one and now you have fourteen rolls of film and no idea which camera they came from or when the roll was shot. Have tape and bits of paper too! Label the rolls as they’re drying without actually touching the wet film.
The scissors are to cut the film inside the darkbag. The most dangerous part of the process, in my experience.
The Process
1. Go on a journey in the darkbag
More detailed info on getting the film wound here.
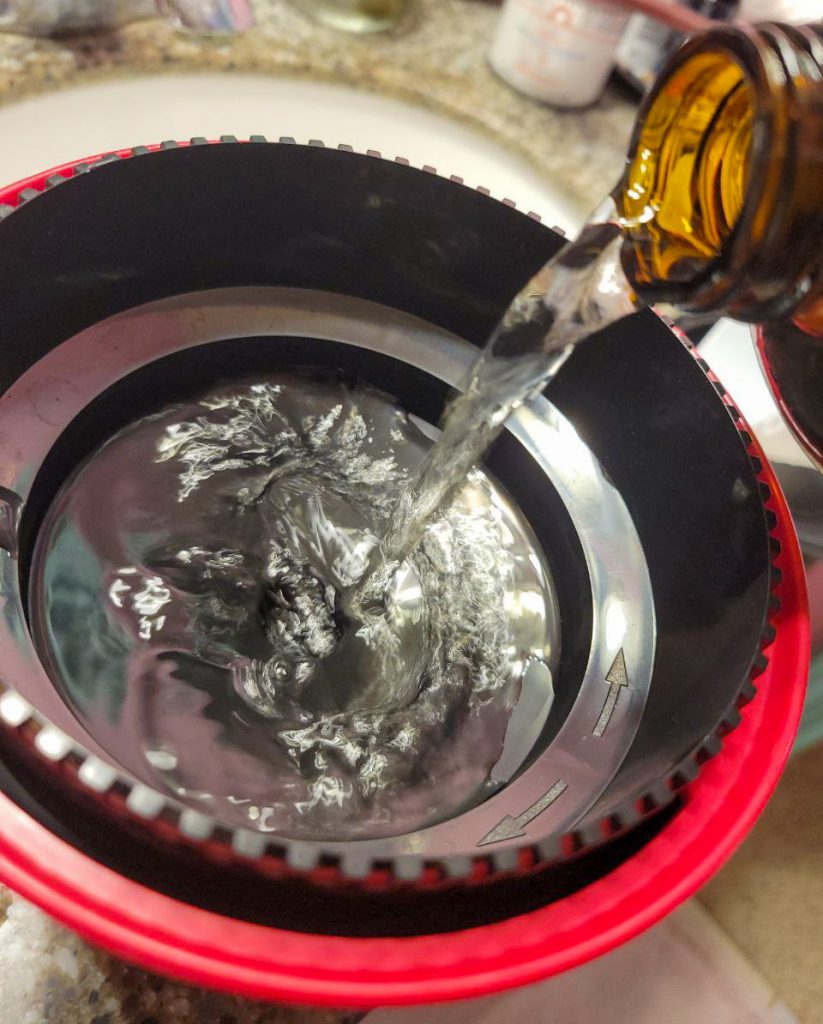
2. Mix up the chemicals
Notes on Developer:
It will heat the water up about 10 degrees Fahrenheit when you add the mix. You’re supposed to start with water at about 100 degrees, and develop with Developer which is at 102 degrees. So, after mixing it, you will need to let it cool a bit. I set the jug on the cold tile floor while I mix up the rest of the chemicals and get the tub ready.
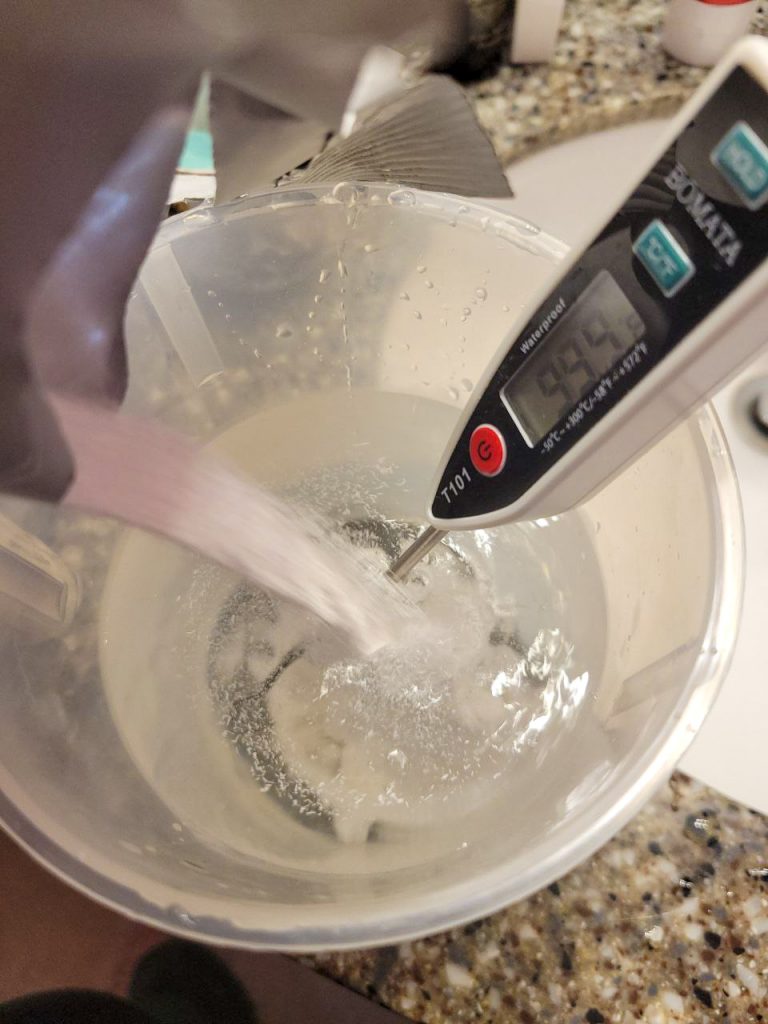
Notes on Blix:
This is a two part system and different kits have different instructions. I used Cinestill this time around, which wanted me to mix part A in the beaker, put it in the jug, then add part B directly. Then swish back and forth between jug and beaker. I did it a few times until the sludge was mixed in, and *then* topped off the water.
Notes on Stabiliser:
Modern film doesn’t need stabiliser I guess. I bought this new kit and was confused because it was missing. Turns out we don’t need it anymore. I, however, was developing some expired and very old rolls this go, so I purchased some stabiliser to soak it in after the wash. Might have been fine without it, but I felt better having it.
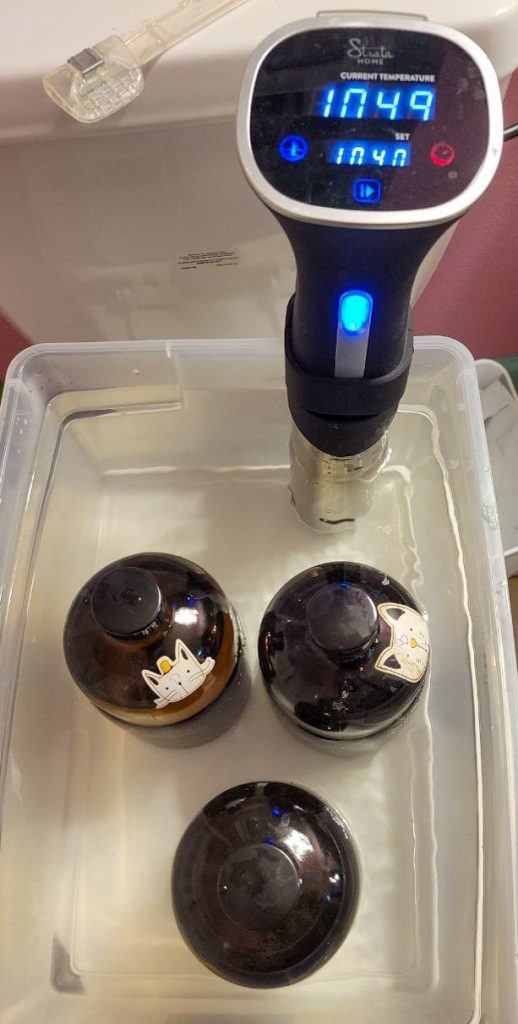
3. Set up the sous-vide in the container, and place the bottles in water
Now, you place the full bottles in the container and set up the sous-vide, and you start filling that tub with water that’s about 105 degrees. Get the water as high as is feasible without sloshing or risking overflow. The higher the container, the better. I’d like mine to be taller.
During this whole process, you’ll remove a jug, use it, and then when you’re done with that step, you’ll place it back in the tub where it’ll wait for the next roll you develop. You use each jug once per tank, and the rest of the time they just wait in the water.
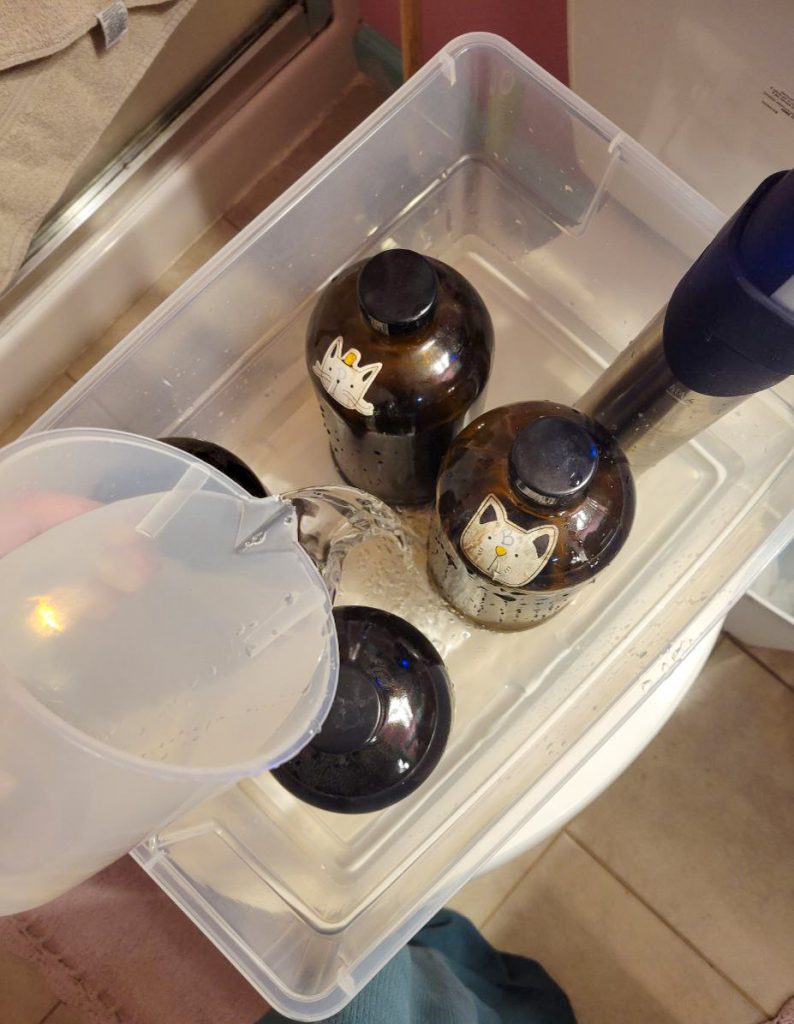
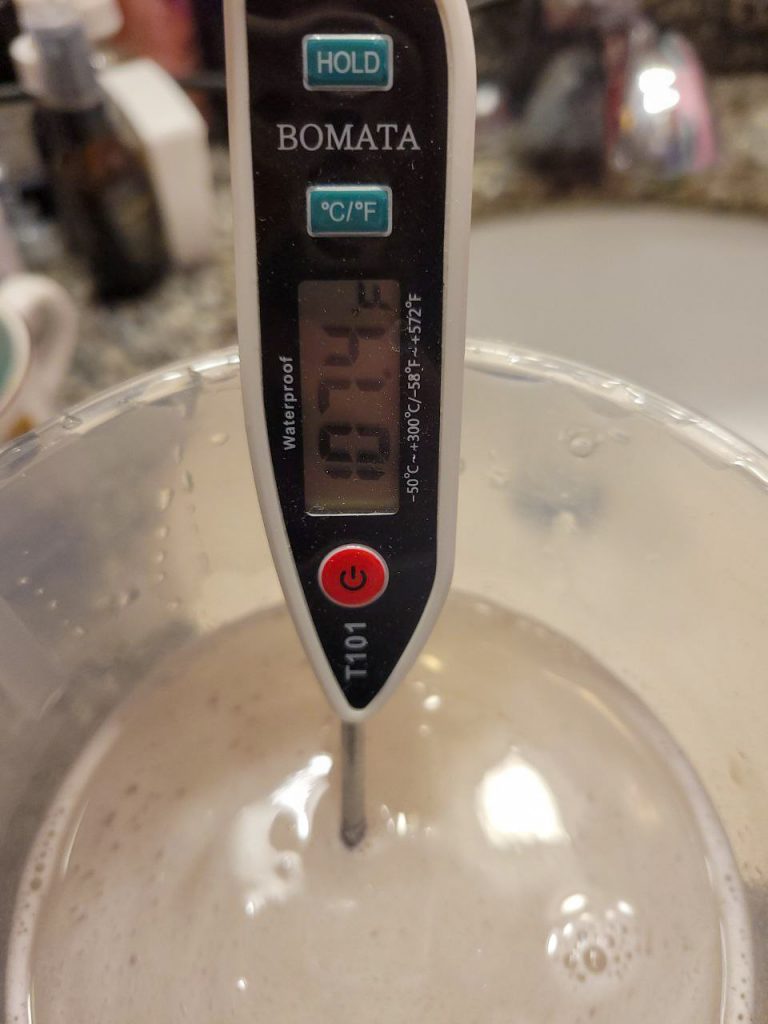
Set the sous-vide, set to around 105 at first to get your jug of water up to 102, then lower the sous-vide to about 102.5 and put the Developer and Blix jugs in there. Then monitor the temperatures of your Developer, Blix, and your jug of water (for the pre-soak). Stabiliser just sits out at room temperature.
This is a finicky situation, especially with the Developer, because it’s pretty direct about what temperature it needs. The Blix has give from 95-105 degrees. But 102 is the magic number for Developer. Once you get it between 102 and 103, though, the sous-vide should just maintain that. Factors like the temperature of your room also matter here a bit. I was doing all this beneath an open window in winter, so I needed to turn the thing up a bit.
If, for some reason, you pull the developer jug out, put it on your counter, test the temperature, and find that it’s suddenly 105 degrees or some such, you can run cool water over the side of the jug for a while to cool it. Keep the thermometer in there to watch the temperature drop, but be careful not to add more water to the liquid inside the jug.
4. Pre-soak
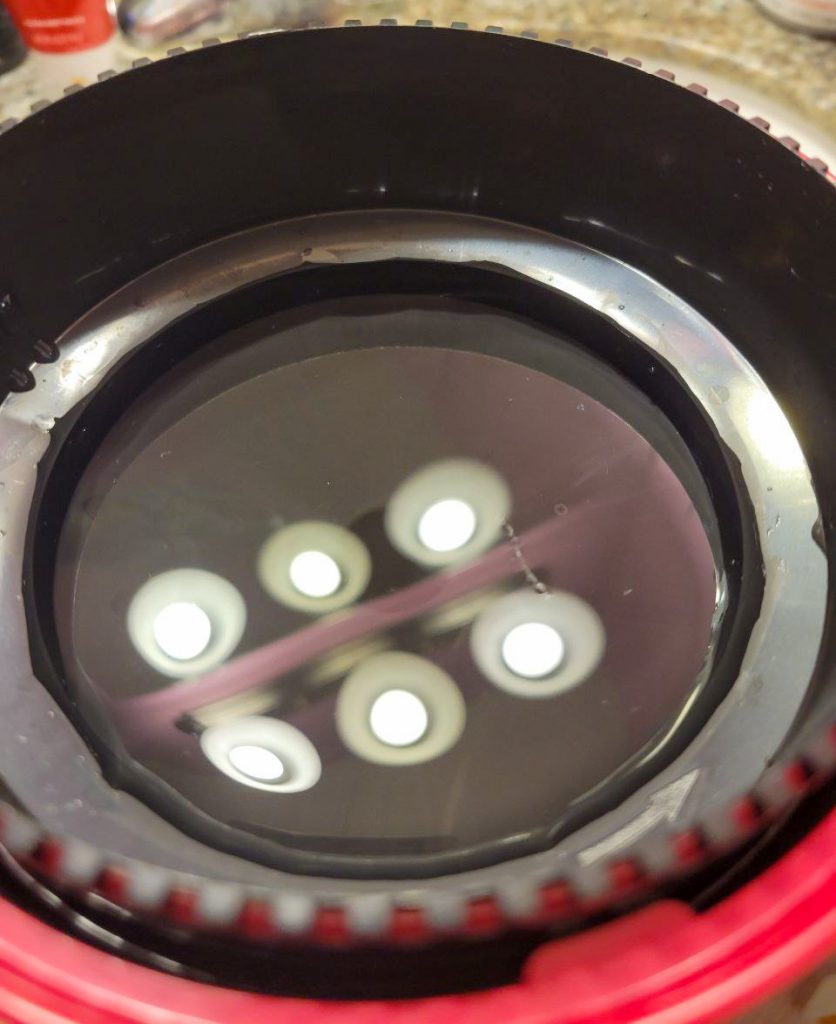
This step is just to prepare the film. It’s to get it up to the temperature of the Developer, and get it wet. I use tap water. Some people use distilled. Make your choice as you wish, I’ve never had a roll disintegrate because of my tap water. You do this soak for a minute, without agitating the tank or inverting it. Just let it hang out.
When you pour your water back into the jug, it will come out either pink or green, and sometimes quite dark. That’s normal.
5. Developer
The part that we’re all the most nervous about, because of the temperature. This is the part where, at an advanced level, you can push or pull the temp/time to get different results. We’re not going to get into that, but I think it’s important to know that so you can see that having 102.8 degree developer or 101.5 isn’t going to melt or freeze your roll. It’s not going to ruin it. It might affect the contrast, but you can do that too in the computer, so it’s not the biggest deal in the world. You’ll still have a great photo set of your dog or pretty flowers. I try not to get too nervous here, because the variations are what make this fun for me.
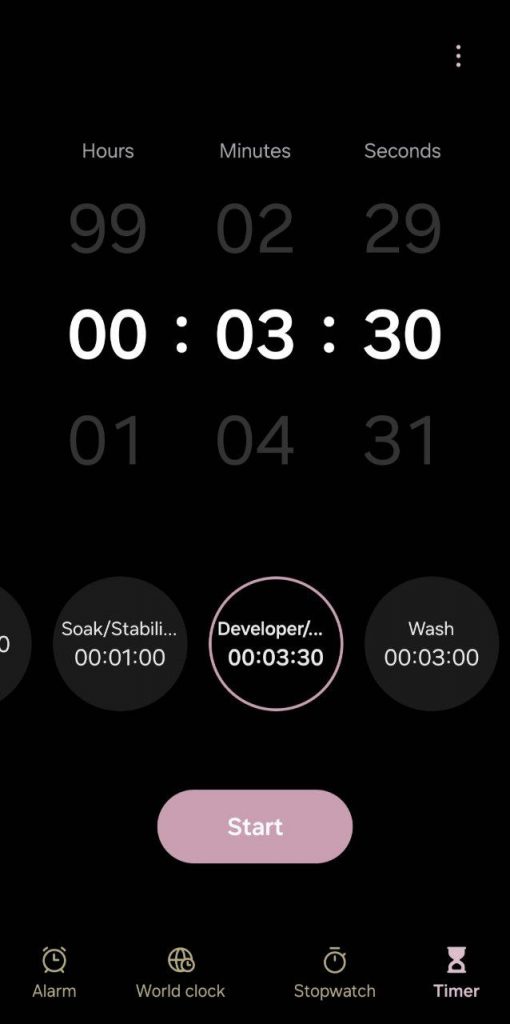
The Developer step is supposed to last 3.5 minutes. And I’m going to tell you exactly what to do for the whole thing. I’ve seen this confuse people, so hopefully this helps:
- Get your timer ready at 03:30, but don’t hit ‘go’ yet.
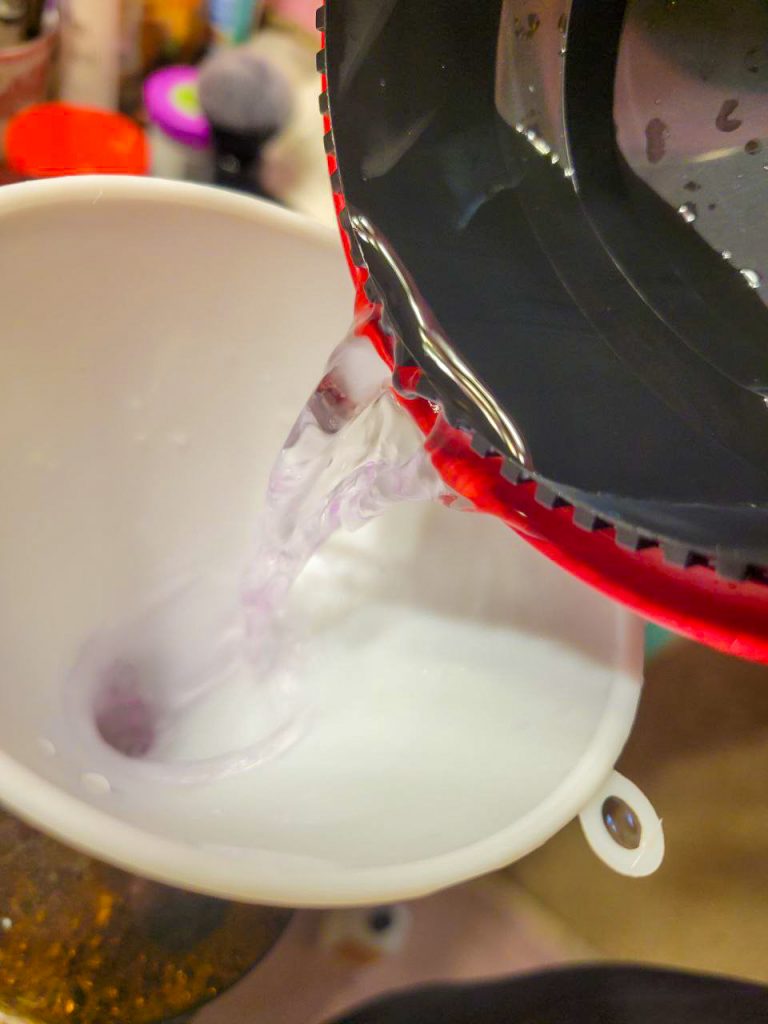
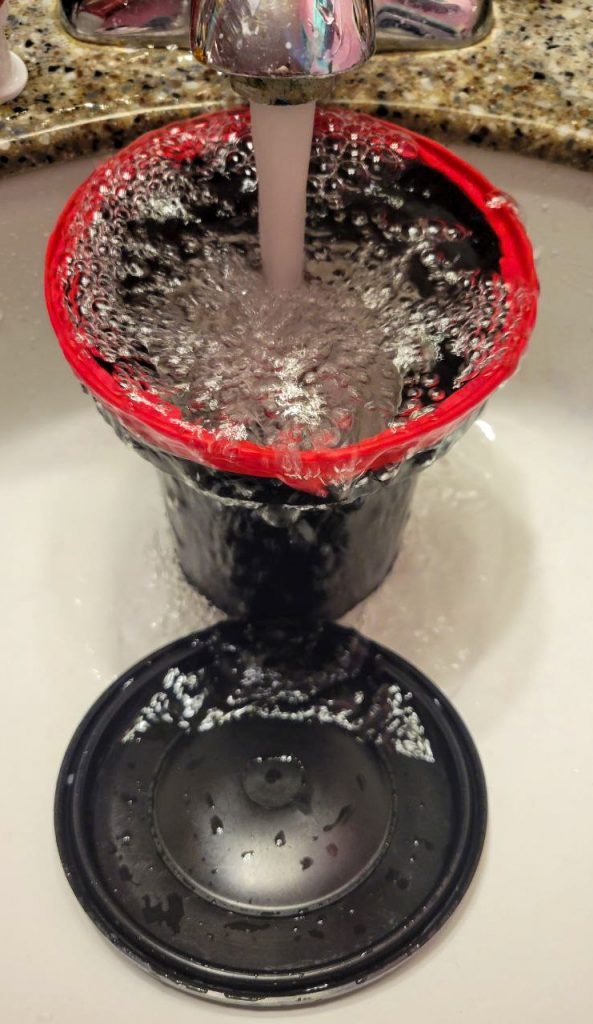
- Pour the Developer into your tank. You probably won’t empty the entire jug into the tank. I fill slowly until the little inner basin is full (see image below).
- Hit ‘go’ on the timer.
- Agitate the developer with the little stick that came with the tank until the timer reads 03:20.
- Put the outter lid on and stop touching the tank.
- When the timer reads 03:00: do four inversions, then set the tank down and don’t touch it.
- When the timer reads 02:30: do four inversions, then set the tank down and don’t touch it.
- When the timer reads 02:00: do four inversions, then set the tank down and don’t touch it.
- When the timer reads 01:30: do four inversions, then set the tank down and don’t touch it.
- When the timer reads 01:00: do four inversions, then set the tank down and don’t touch it.
- When the timer reads 00:30: do four inversions, then set the tank down and:
- With your last 20-ish seconds, remove the outer lid and rinse it (NOT the one you pour the chemicals into), put the funnel into the mouth of the Developer jug, and wipe up any spills with a paper towel or something.
- Carefully funnel the Developer back into the jug (rinse the funnel too), and put the jug into the container with the sous-vide.
The four inversions take about ten seconds to do, so you’re inverting for ten and setting down for twenty, six times in a row.
Common questions:
Do I put the tank into the tub of water when it’s ‘at rest’ during the cycle? I don’t. The first time I ever developed film at home, I did, because I was scared that a drop of half a degree would destroy my images. I’ve developed hundreds of rolls since then without doing it and, like I said, not a single destroyed roll (not through any fault of mine, anyway).
What’s the difference between agitation and inversion? Here’s a couple of videos to guide your way:
Agitating is done with the little stick that came with the tank. If you have a metal tank, flipping it upside down once and then putting it firmly back on the counter (with a tap, to get any bubbles to dislodge) should be a good agitation.
Inverting the tank is flipping it upside down and turning it at the same time.
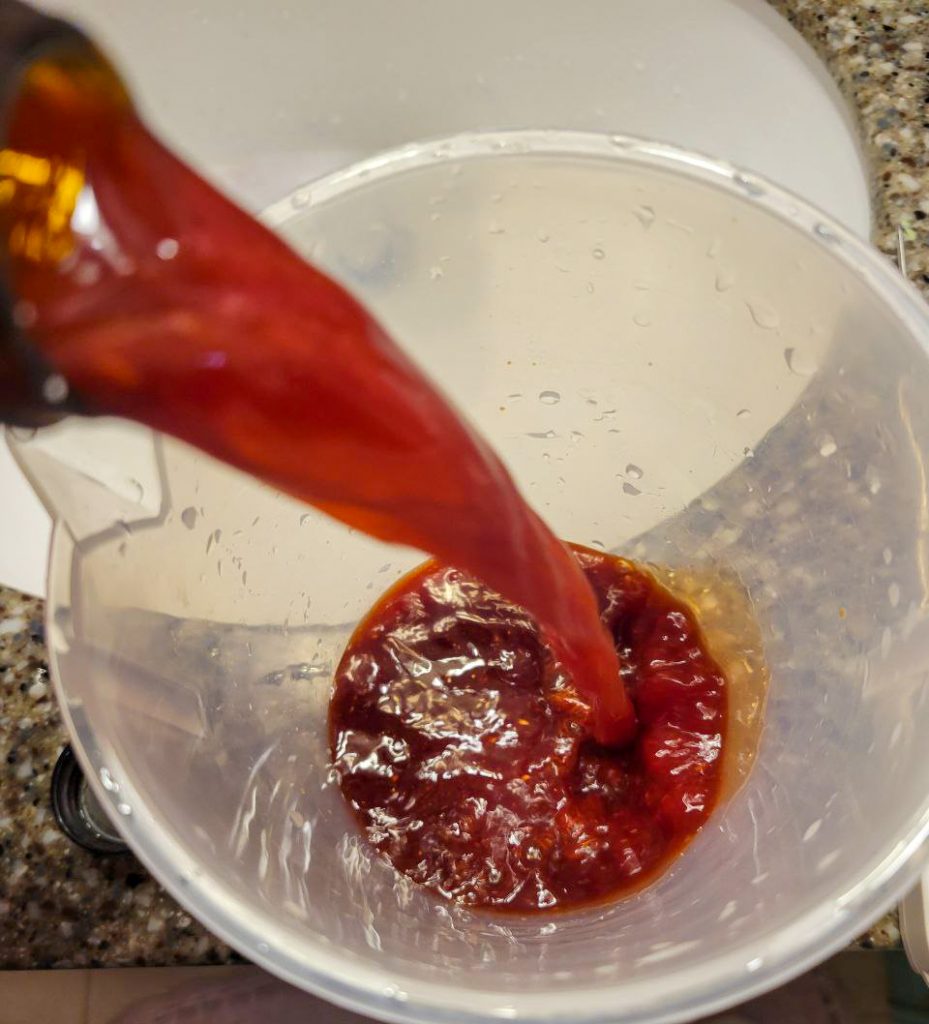
6. Blix
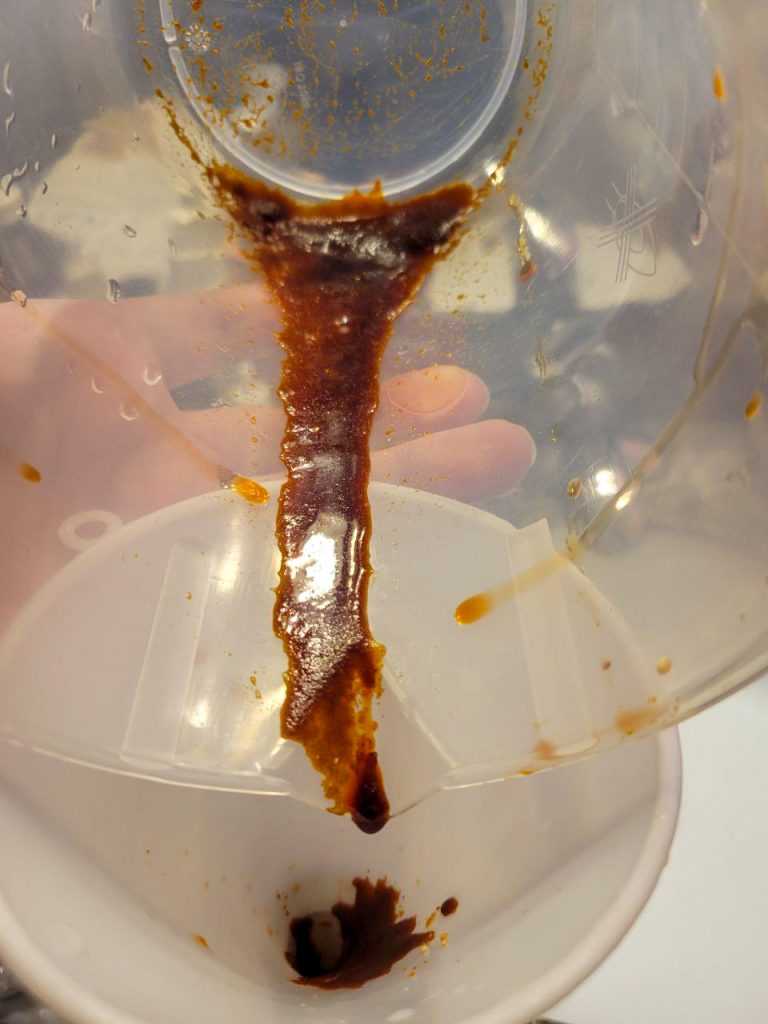
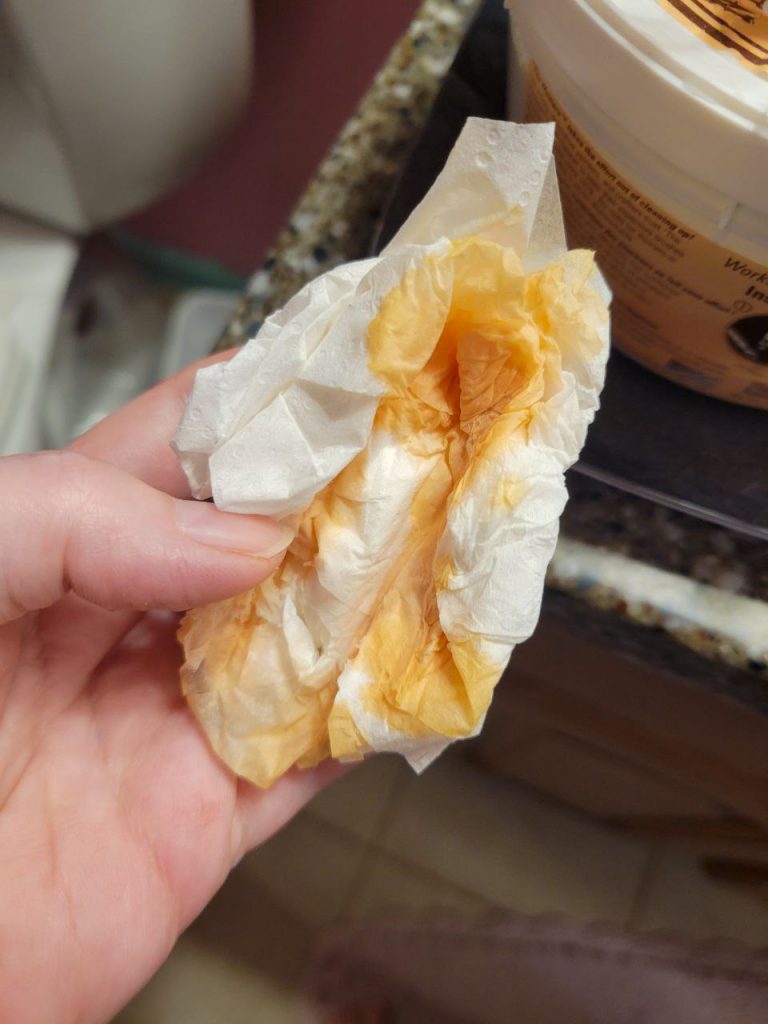
You’ve conquered the Developer stage and the good news is that the Blix stage is identical in terms of timing and agitation/inversions. The only thing that’s different, is that you will definitely have to release the buildup of heat and chemical reaction from the tank after your inversions (you can do this with the Developer too, to get yourself in a groove). If you don’t push the air out, Blix (which is BLeach and fIX) will get all over everything. It will leak everywhere, it will make your hands both slimy and dry at the same time (wear gloves), and it will turn all your fabrics white. Do this step with a paper towel, because this is what will spray out of the tank:
But, other than that, everything is the same.
7. Wash
Now, your film can survive outside the womb. We’re not done, but we’ve gotten past the two major parts that make everyone nervous. And, to think, it was about ten minutes total to get through them.
This part goes against everything I was ever shouted about as a child, but you’re going to run the tap for three whole minutes now. You can remove that inner lid now, too. I turn the tap on, check the temperature (make sure it’s between 95-105 Fahrenheit), rinse the inner lid, and then place the tank directly beneath the stream. That three minutes, I spend wiping up spills.
8. Stabiliser
If you’re doing this step, now’s the time. I put the inner lid back in for this because it makes it easier to pour back out. But you just pour room temperature stabiliser in the tank, give it a ten second agitation, and then let it sit for fifty seconds. One minute total. Then, funnel that back in the jug.
9. Dry the film
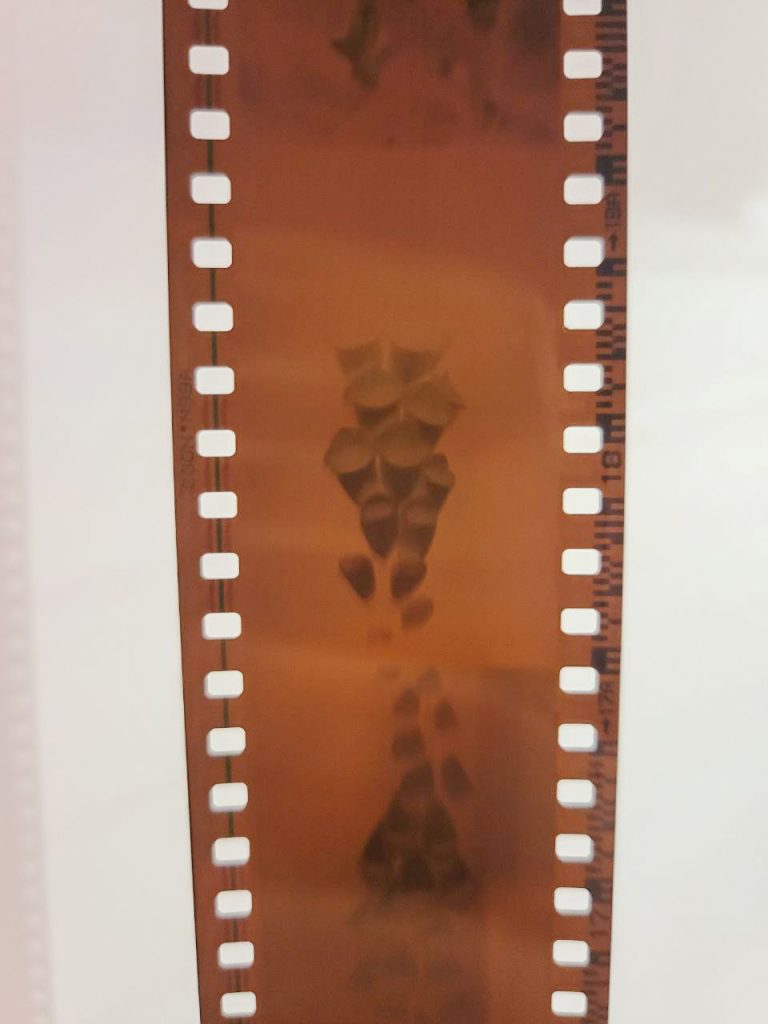
Now, you get to remove your wet film from the spools, squeegee it off, and hang it to dry. Immediately, you get to see little tiny negatives of all the things you took pictures of. And it only took like half an hour.
10. Repeat!
An important note: If you’re going to do another batch of film now, use a towel and dry your film spools!!! Especially make sure you dry the little ball bearings if you’re using a plastic one. Trying to get dry film into a wet spool inside of a dark bag will make you so frustrated that you’ll instantly become a werewolf. The tank is going to be wet as well. Dry it off. Dark bag = dry bag.
What Next?
I took you as far as developing the film, as for viewing and scanning the photos? That is a completely different thing. But here are the three levels of viewing your photos in actual colour:
Level One: your phone and a lightbox
Even though you just invested all this time and effort into getting the developing setup, you can always view your negatives by way of a cheap lightbox (or a window on a sunny day if you really hate things that plug into the wall) and a digital camera of some nature. I suggest you make a sandwich of lightbox-film-sheet of glass in order to flatten the strip. Once you have the digital pictures of your analogue pictures, you can invert them in the computer (maybe phones do that too, I’m sure they do) and edit them from there. I used to do this very thing back in those same days where I refused to buy a film squeegee.
Level Two: a regular scanner and a lightbox
If you have a regular scanner, like to sorts that are generally attached to printers, you can do a bit of modification. Important note: you cannot just put the film into the scanner and go, it has to have a lightsource from behind or you just get a scan of tobacco-coloured strips with holes in them. So, you can use that cheap lightbox. The level two sandwich is scanning bed-film-lighbox. That sheet of glass might help too, though, since there is an annoying little gap that will let the film curl just enough to drive you bonkers.
Level Three: a film scanner
If you enjoyed yourself and plan to do this again, these are a worthy investment. They have the backlight built in and you can invert the colours automatically. Also, they are designed to capture a lot more information than a regular scanner, or so they say. I mostly like that this is the quickest option. It still takes a very long time to scan film (I have about twenty years worth of negatives that I ponder and dread regularly every time I pass the box), but this at least removes the inverting and finagling with the levels of each individual frame. Also, they come with templates that hold the film flat for you without needing to use any glass. Highly recommend.
Bonus Level: shipping it to someone with a film scanner
There are places that will do this for you! The same places that will develop the film for you, actually. I’m not sure the cost, but I doubt it’s unreasonable.
Extra Important Notes
Do not cut/scan/touch the film while it’s still wet! If it was dry and now it’s wet again because of any number of reasons, just leave it alone again until it’s dry. Wet film is fragile, and very easy to ruin.
Hold the film by the edges only, rather like how we handle vinyl records or cds (or at least, how I hope you’ve been doing it). Otherwise, dry or not, your fingerprints will get all over the negatives and you will never remove them. If you look through my Minolta 16 scans, you’ll find bits of my fingerprints everywhere because that film is so tiny and not sturdy. Unless you’re going for something artistic, editing the prints out will be a nightmare.
It’s really superbly easy to put the film in the scanner (or on the lightbox) backwards and/or upside down. The film scanner has a little numbered reference so you remember to check the numbers of the frames so that *to you* they appear backwards. They need to be forwards if you’re using a phone/digital camera, but backwards in a scanner. This isn’t the worst thing you can do, it’s easy enough to flip the orientation in the computer or phone, and you usually notice if like the interior of your house is backwards, but you will not remember the orientation of those pretty trees or that interesting bug you saw, so just be aware that sometimes you’re doing it backwards.
What Next-Next?
Oh, you want to print your pictures now, do you? If you want to do it strictly analogue, you’re going to need an actual darkroom. That process can’t be faffed in a dark bag, because it required vast amounts of space and moments where you are actually able to see with the help of a studio light (the sexy red ones). Sometimes, I think I could make that work in my windowless room with enough dedication, but have yet to try it. Also, long ago, my mother sold my enlarger and I shudder to think what it would cost to replace it.
If that’s your bag, you can try to modify your existing space (and get back to me with how it goes), or you could do as I once did and go down to a local university to use their darkroom. If those still exist. It just hit me that they might not, but if lithography is still practiced so too should film photography, right?
Assuming that you’re going the digitisation route, though, just like there are places that will develop for you and scan for you, there are even more places that will print pictures for you. But, if that’s no fun for you, your only other option is to get a printer and some photo paper. But there are levels of this too!
Level One: all-in-one printer and printer paper
I see no shame in doing this. In fact, I see something that will one day be considered ‘vintage.’ The only problem, is that it probably won’t last until ‘vintage’ status because of ligthfastness and acidic papers and all sorts of other things. Then again, stranger things have outlived centuries than a printed image.
Level Two: basic photo inkjet printer and photo paper
This is my level. I have an EcoTank printer and I buy photo paper at thrift stores every single time I see it. I also once found a sealed 100 pack of Photo Rag paper which, oh wow, that stuff really is amazing, even in a non-special printer such as mine. I prefer matte paper (matte everything always, really), but there are different sheens to play with, and my prints come out just fine for my purposes. If I was ever selling any, I’d get them printed professionally through some place like Zazzle (or check if pharmacies/supermarkets still do it). I have printed some of my photographs to large sizes (the biggest is a 30×40 framed above my front door) and they’ve looked marvellous.
Level Three: large format photo printer and photo paper
This tempts me constantly. Being confined to A4 is depressing sometimes.
Level Four: big ol’ pro pigment printer or laser printer
Toner is better for mixed media with your photos (like transfers onto canvas and fun things like that), but pigment inks are the most professional and lightfast way to go about printing. This is all, also, incredibly expensive, and so I’m sorry to say that my advice is going to have to end here, because I can’t bear to look into it all and then fall in love with something I cannot afford. Best of luck to everyone who gets to this level, though!
What Next-Next-Next?
Yeah, there’s more you can do! Of course framing and displaying and selling and gifting, but I’m here to talk about image transferring and mixed media work. But, it’s too much to get into at the very bottom of an incredibly long post (hello to everyone who got here!). So, I’m leaving this space for the future link to my experiments with this fun aspect of photography.

2 thoughts on “Developing Colour Film at Home”