
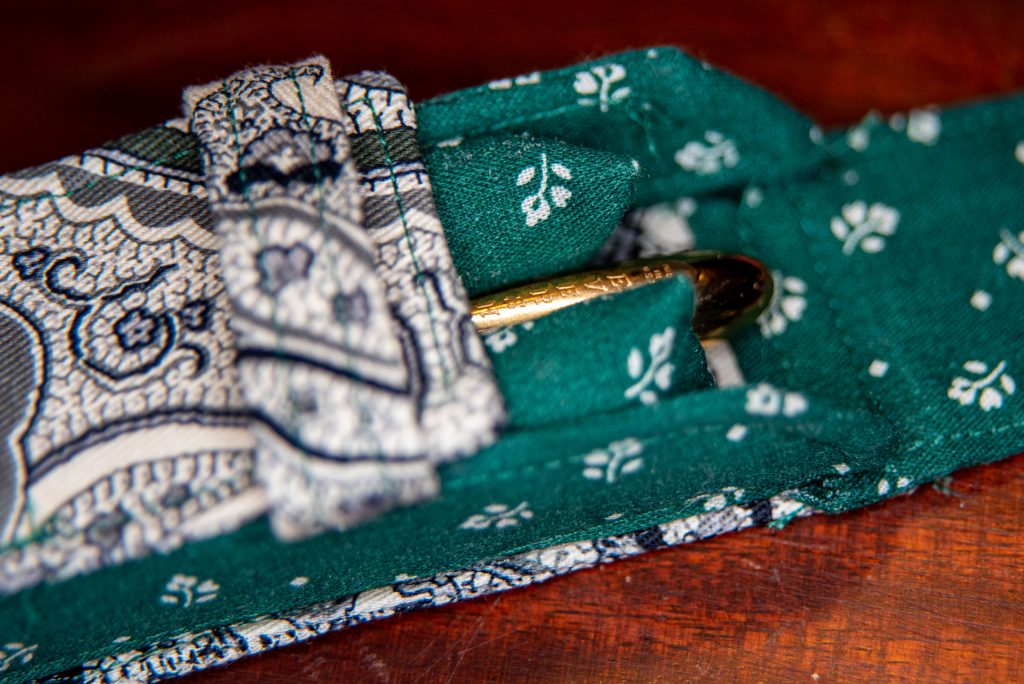
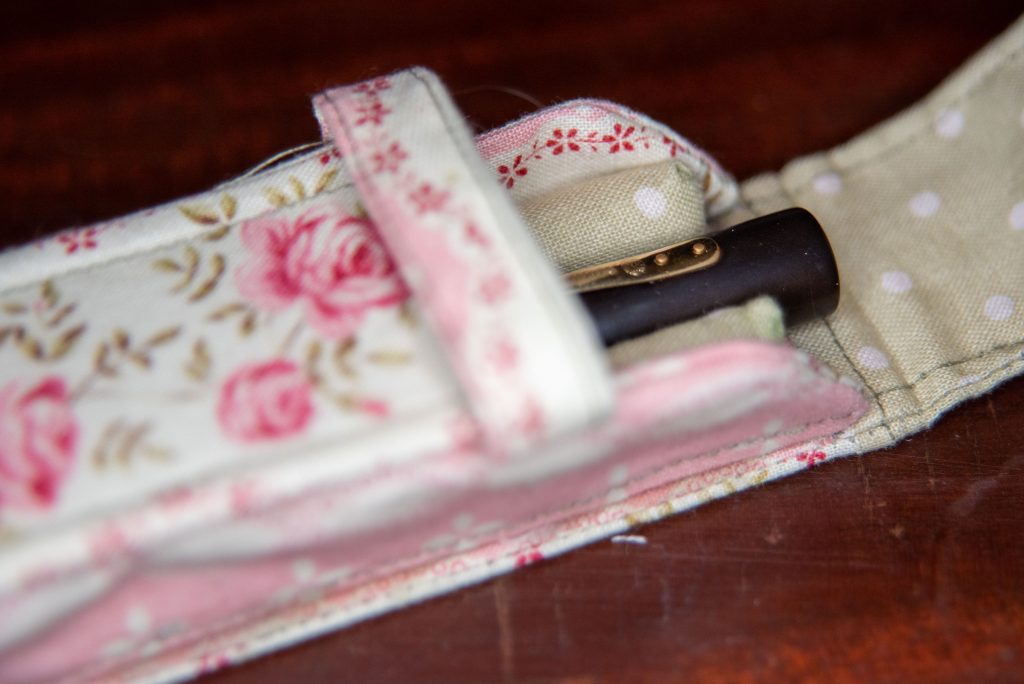
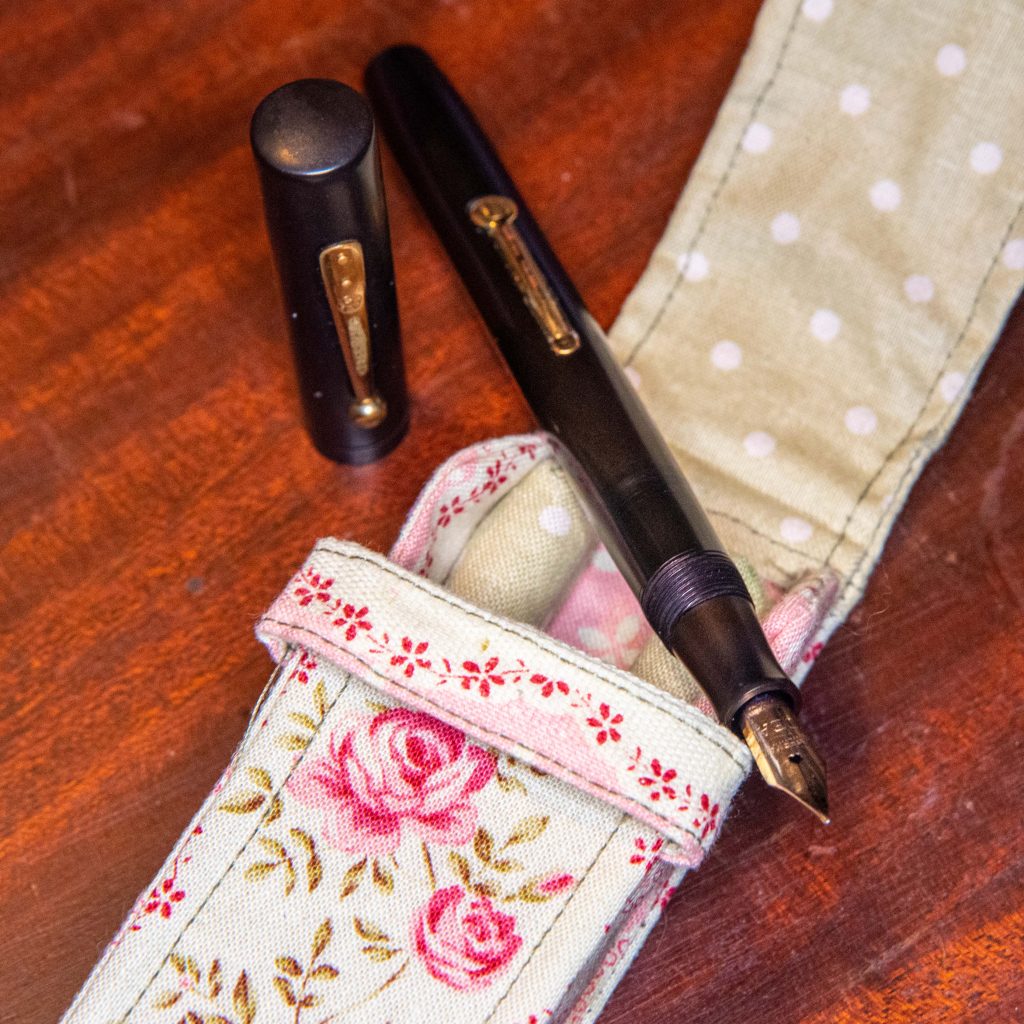
Fountain Pen Casket
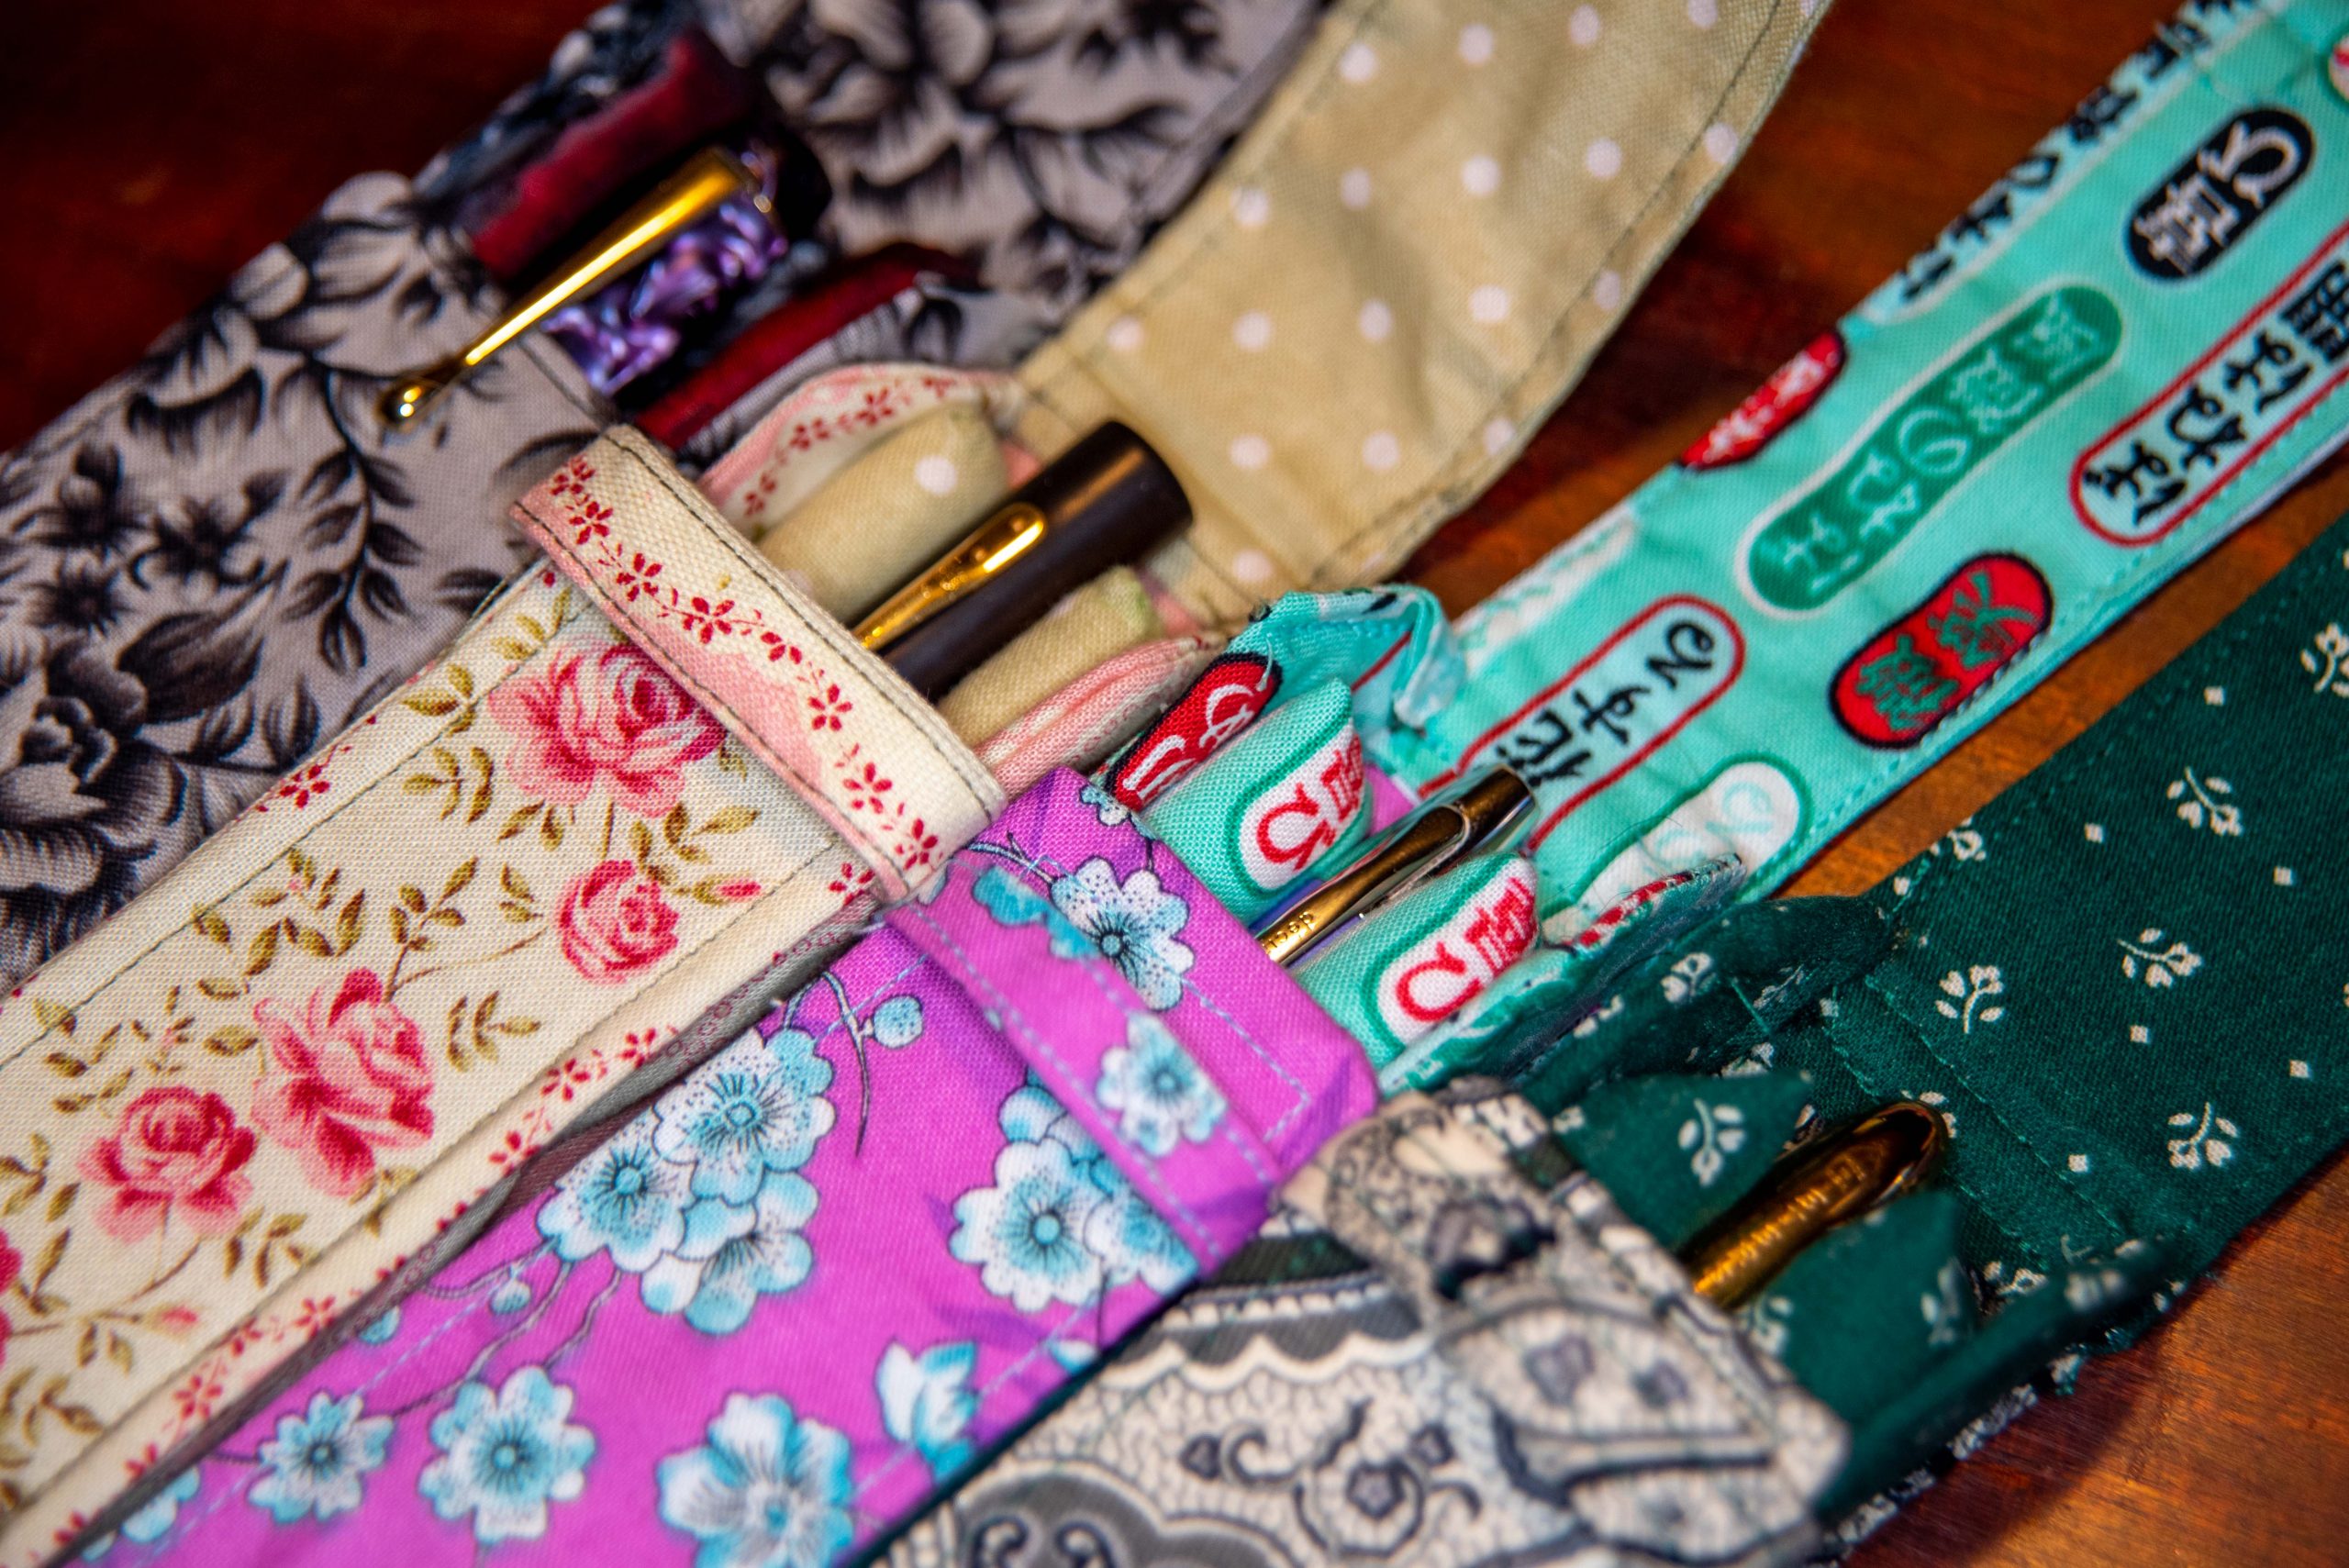
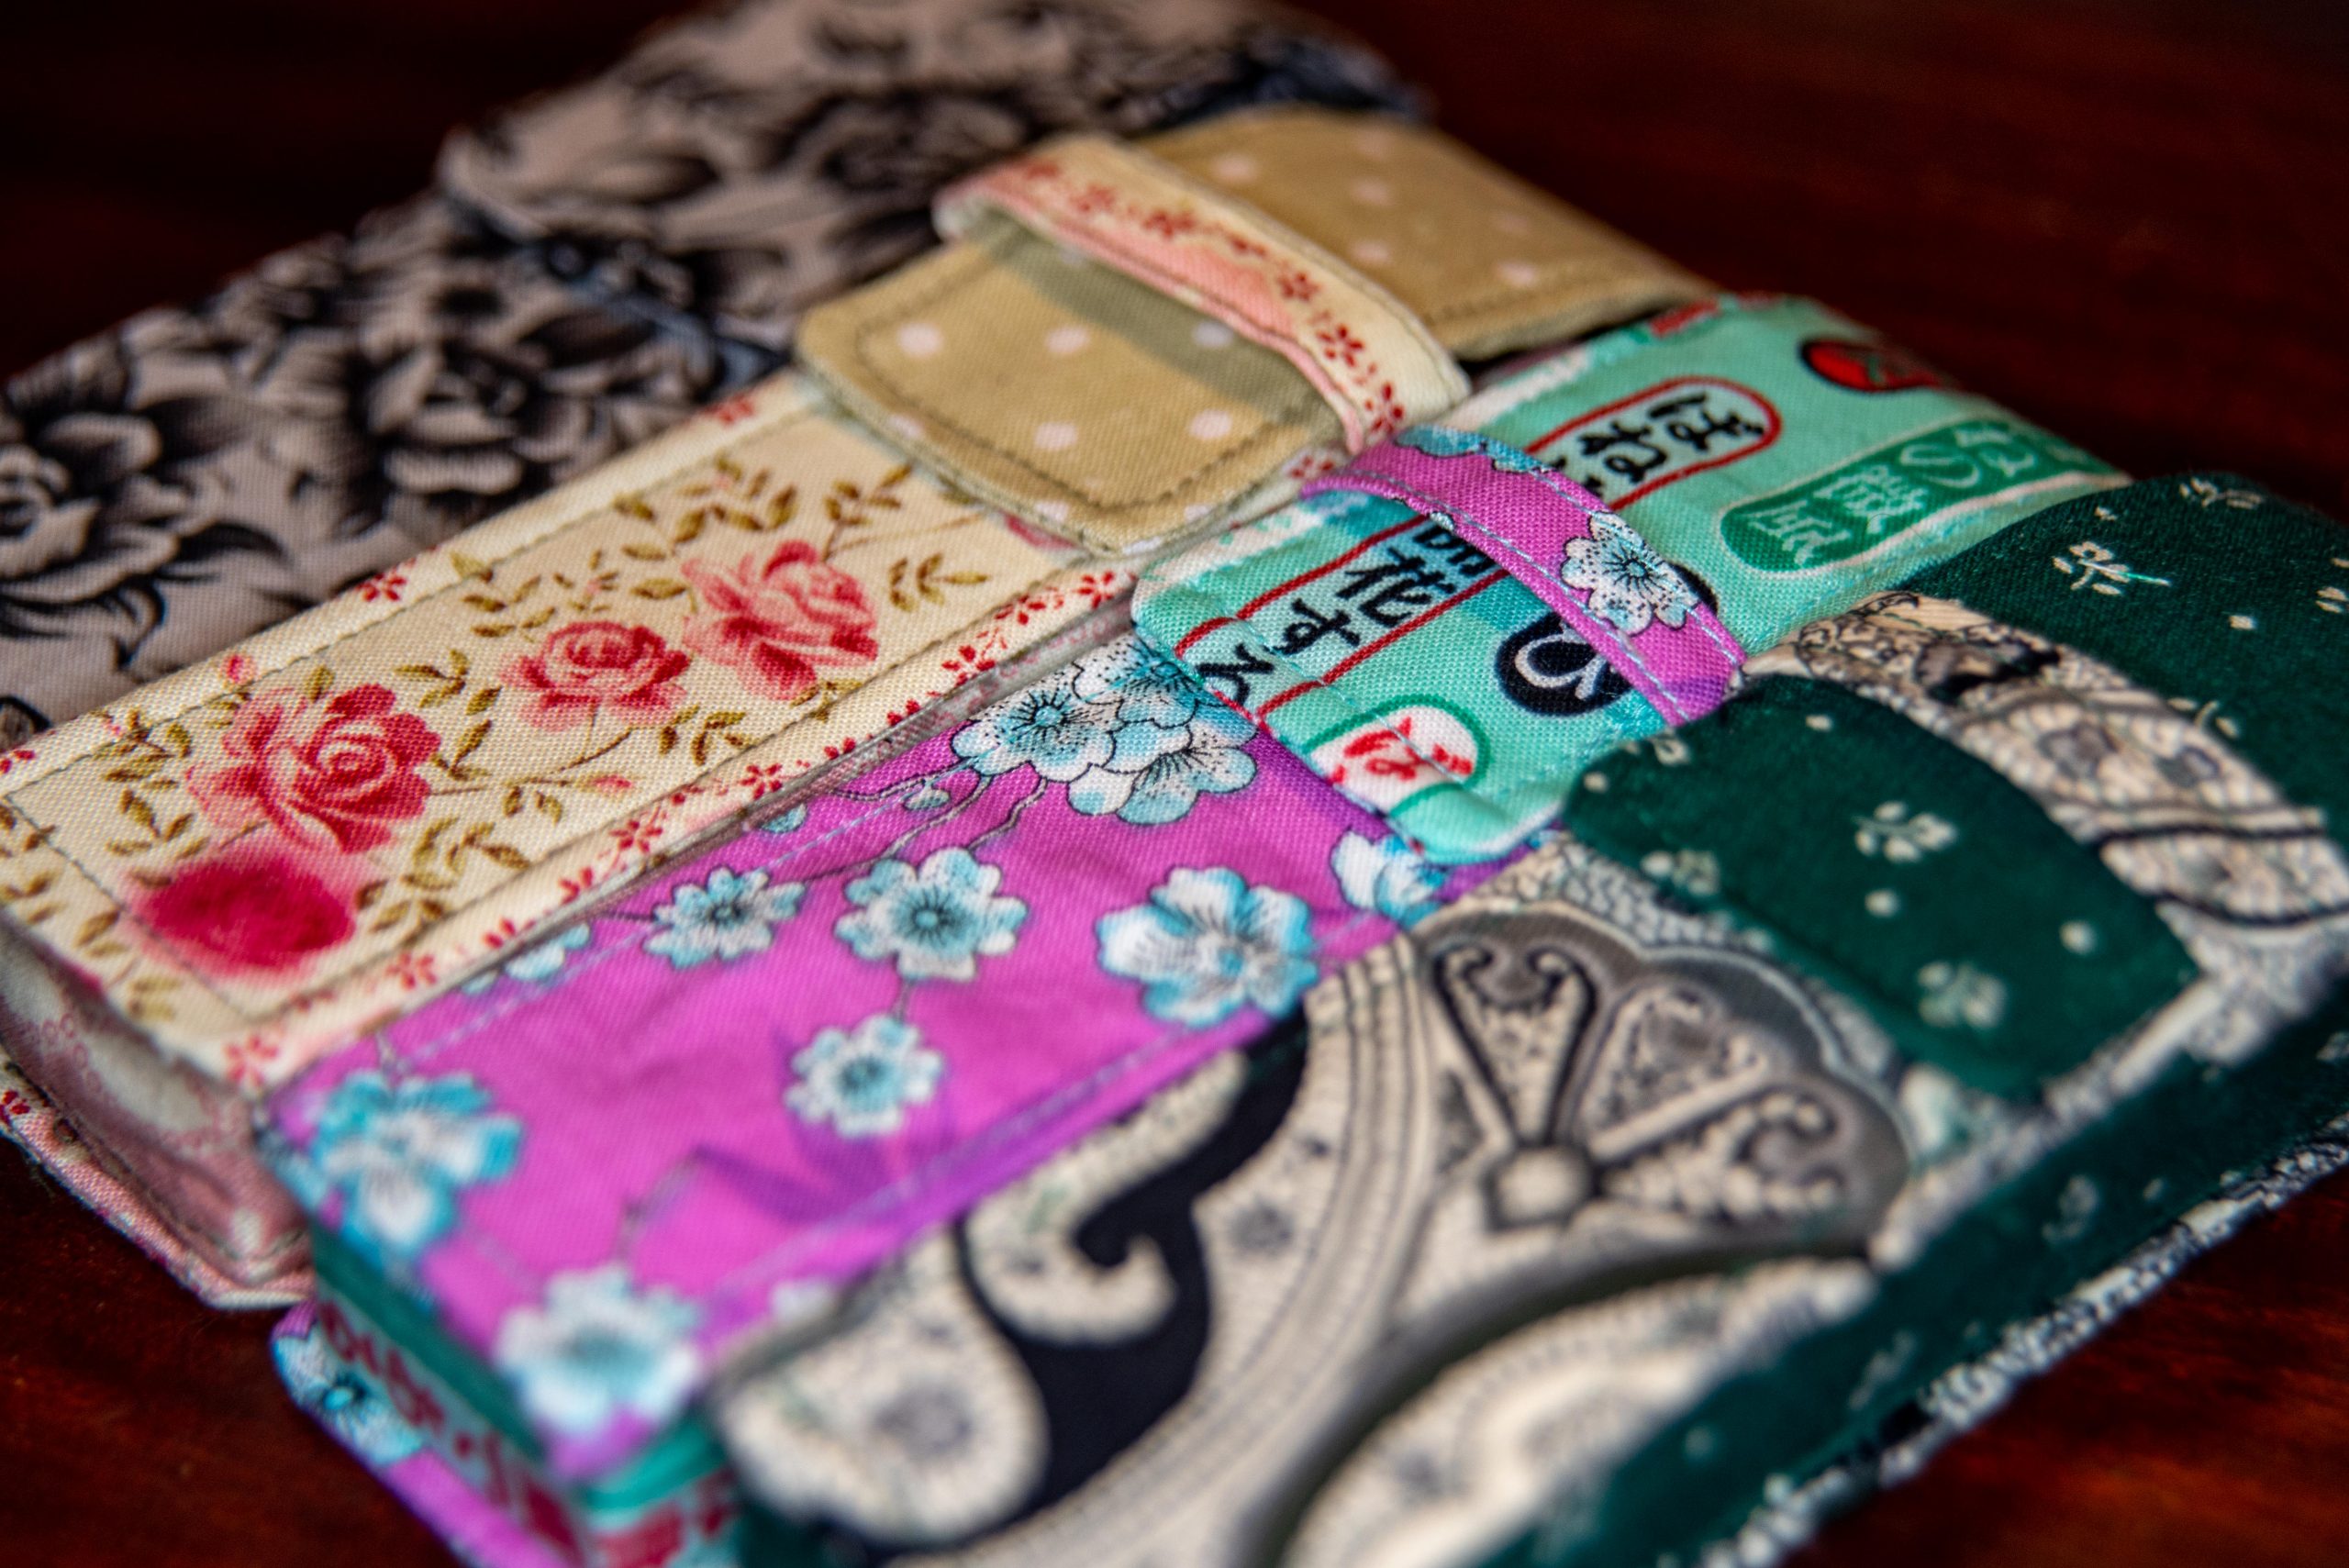
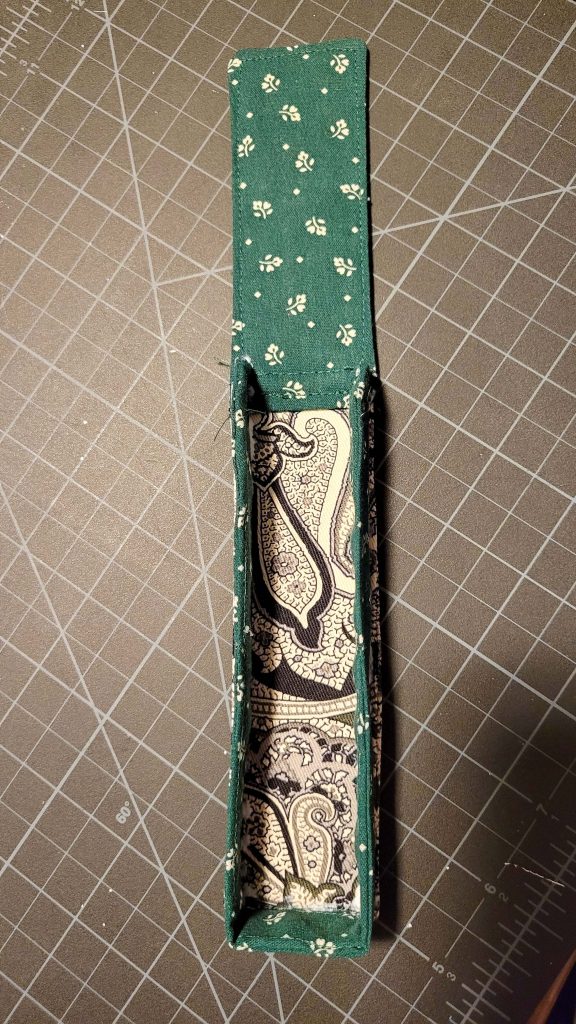
When I received my Waterman 52 as a gift, I wanted a fancy case for it which was more protective and attractive than the typical folded bit of foam. I couldn’t find exactly what I had in my head, so I designed myself something that I would be fine to carry in a bag with all my other on-the-go art supplies. Then I just kept making them for all my fanciest pens.
My pattern can be modified to fit the height of any pen (this will not fit anything longer than 5.25”) and, if the cushions are left out, more pens can fit inside. It’s a bit like a fountain pen casket. In fact, I think making a little cozy coffin for my pens will be the next one I make.
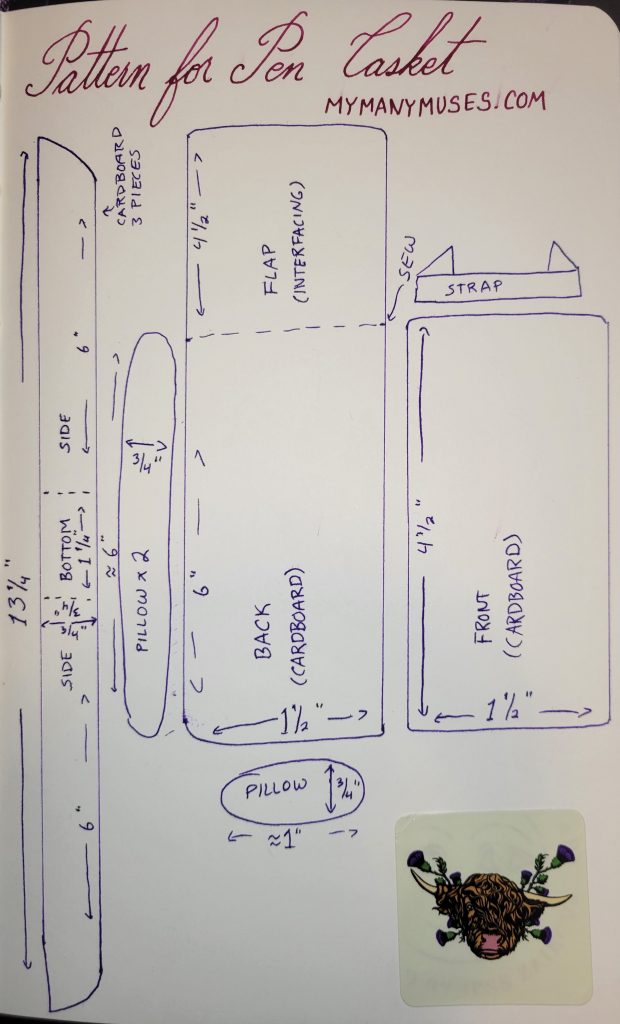
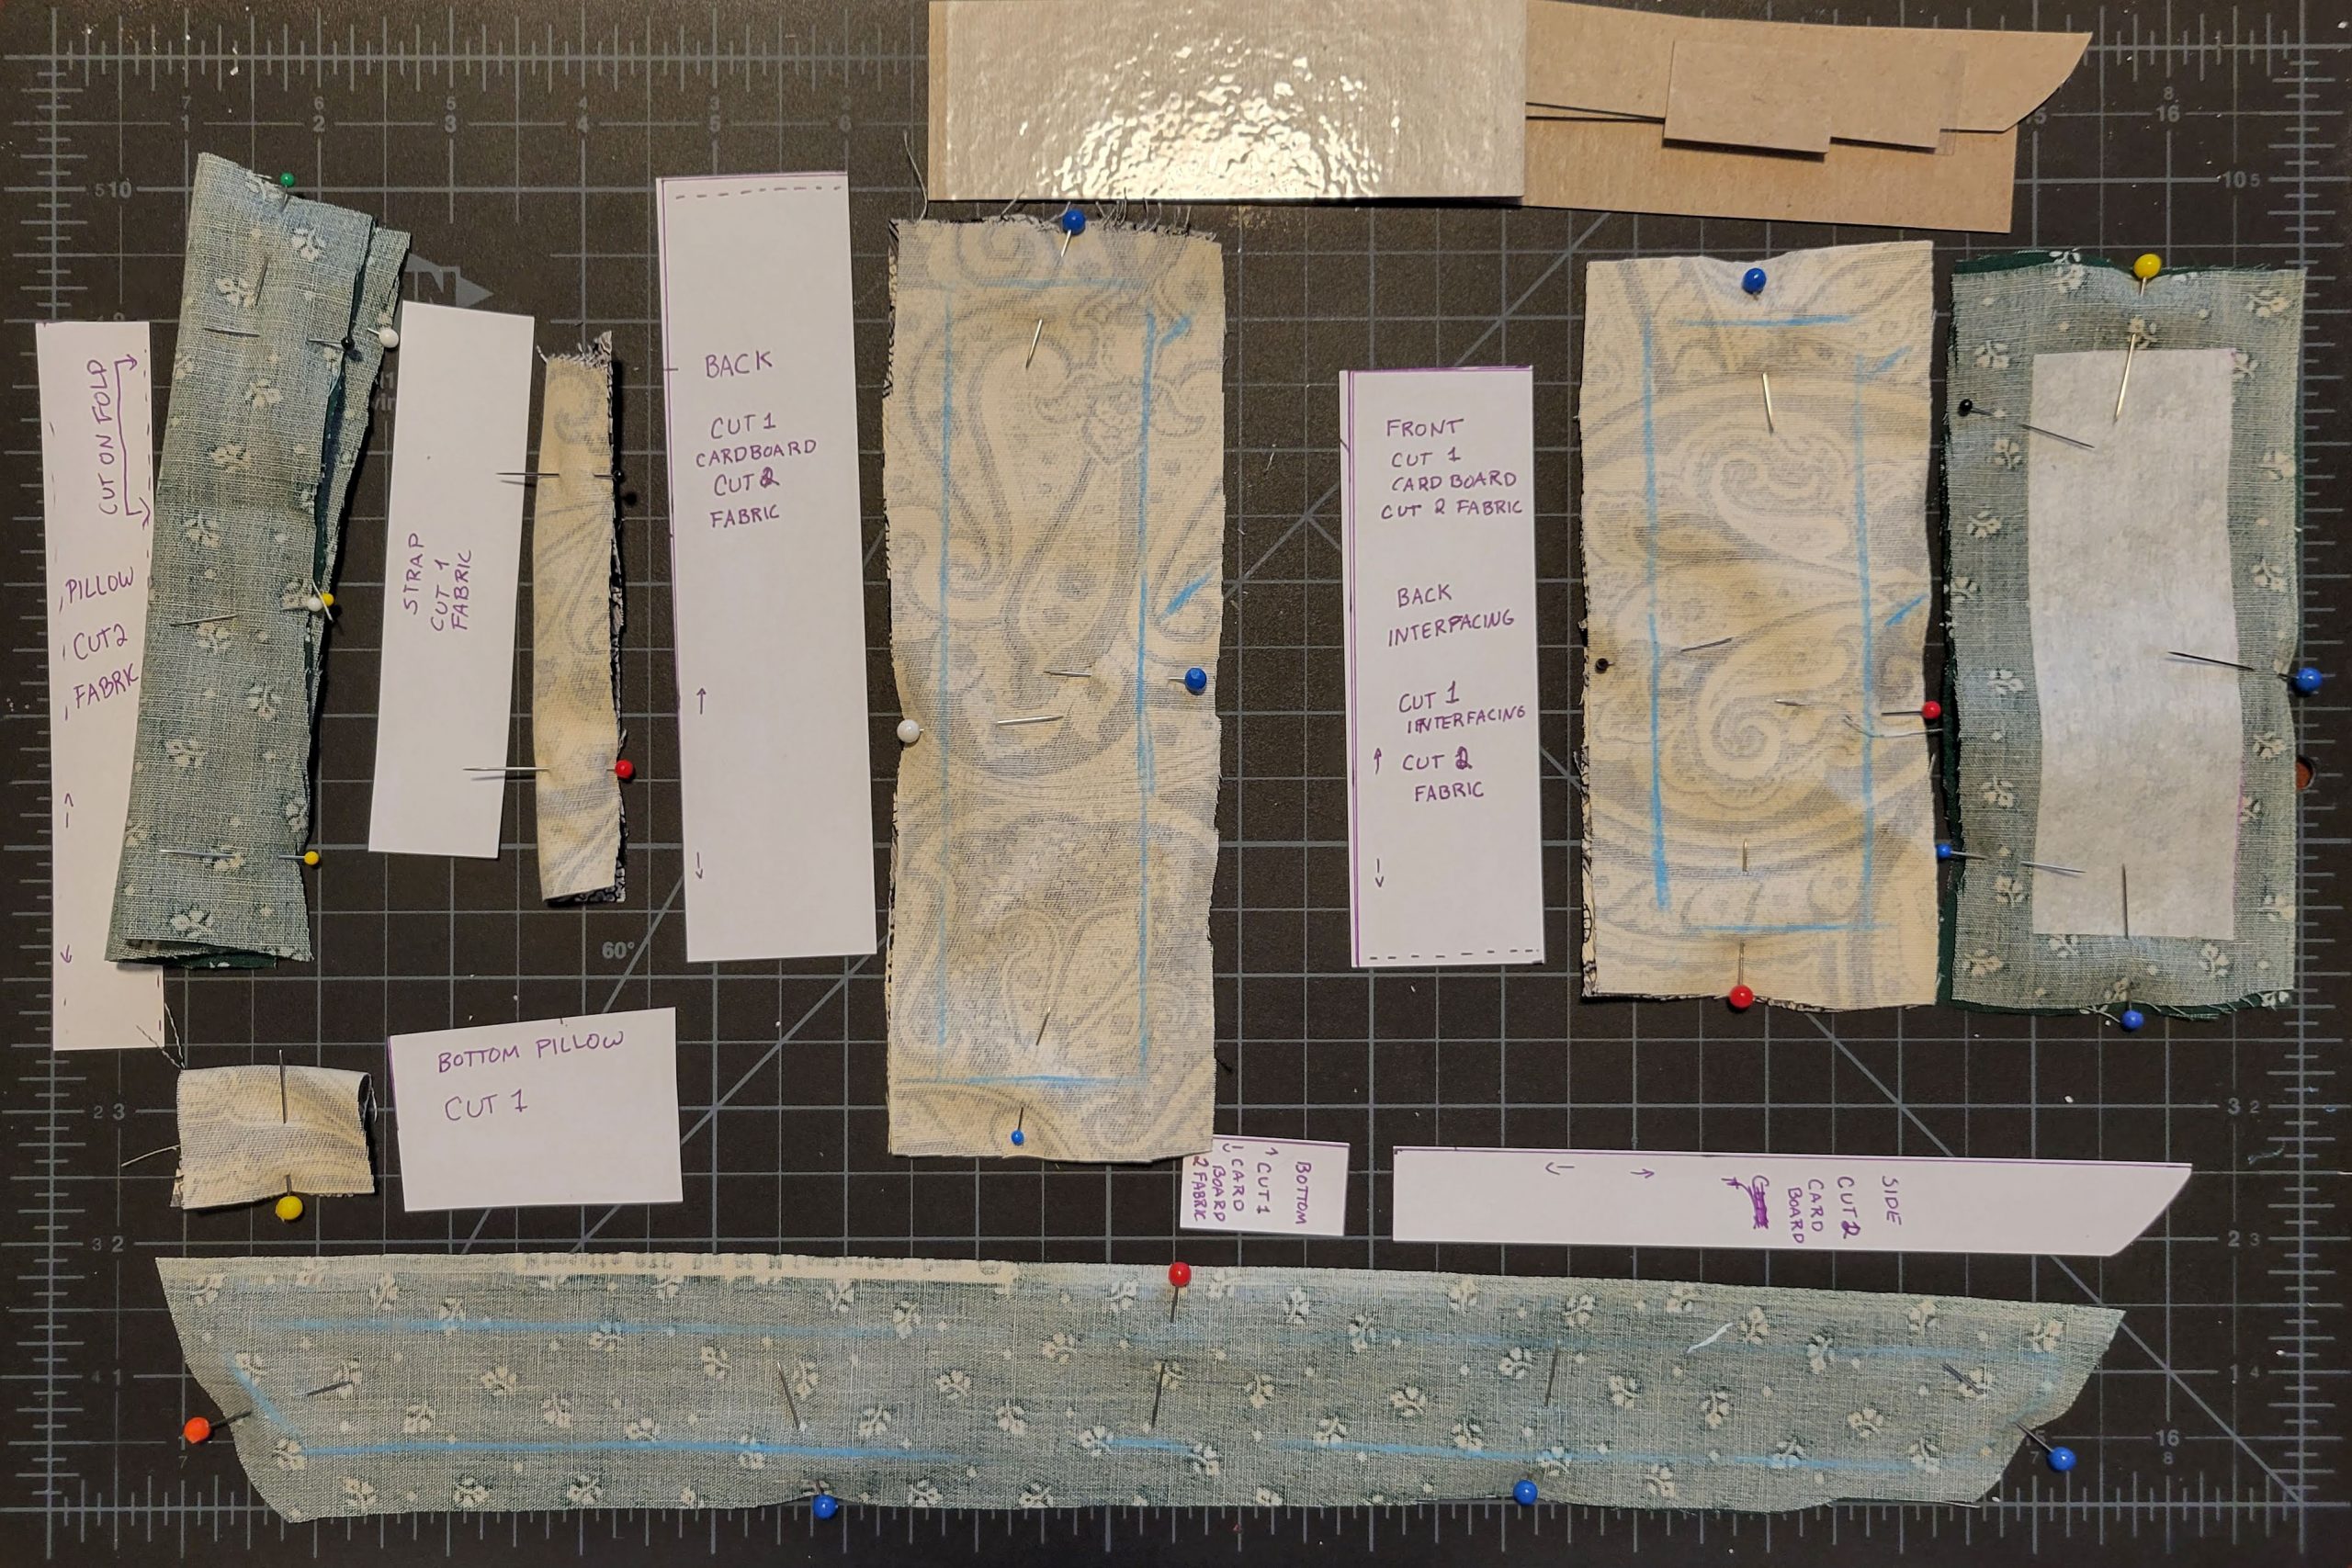
Here is the rough pattern I made:
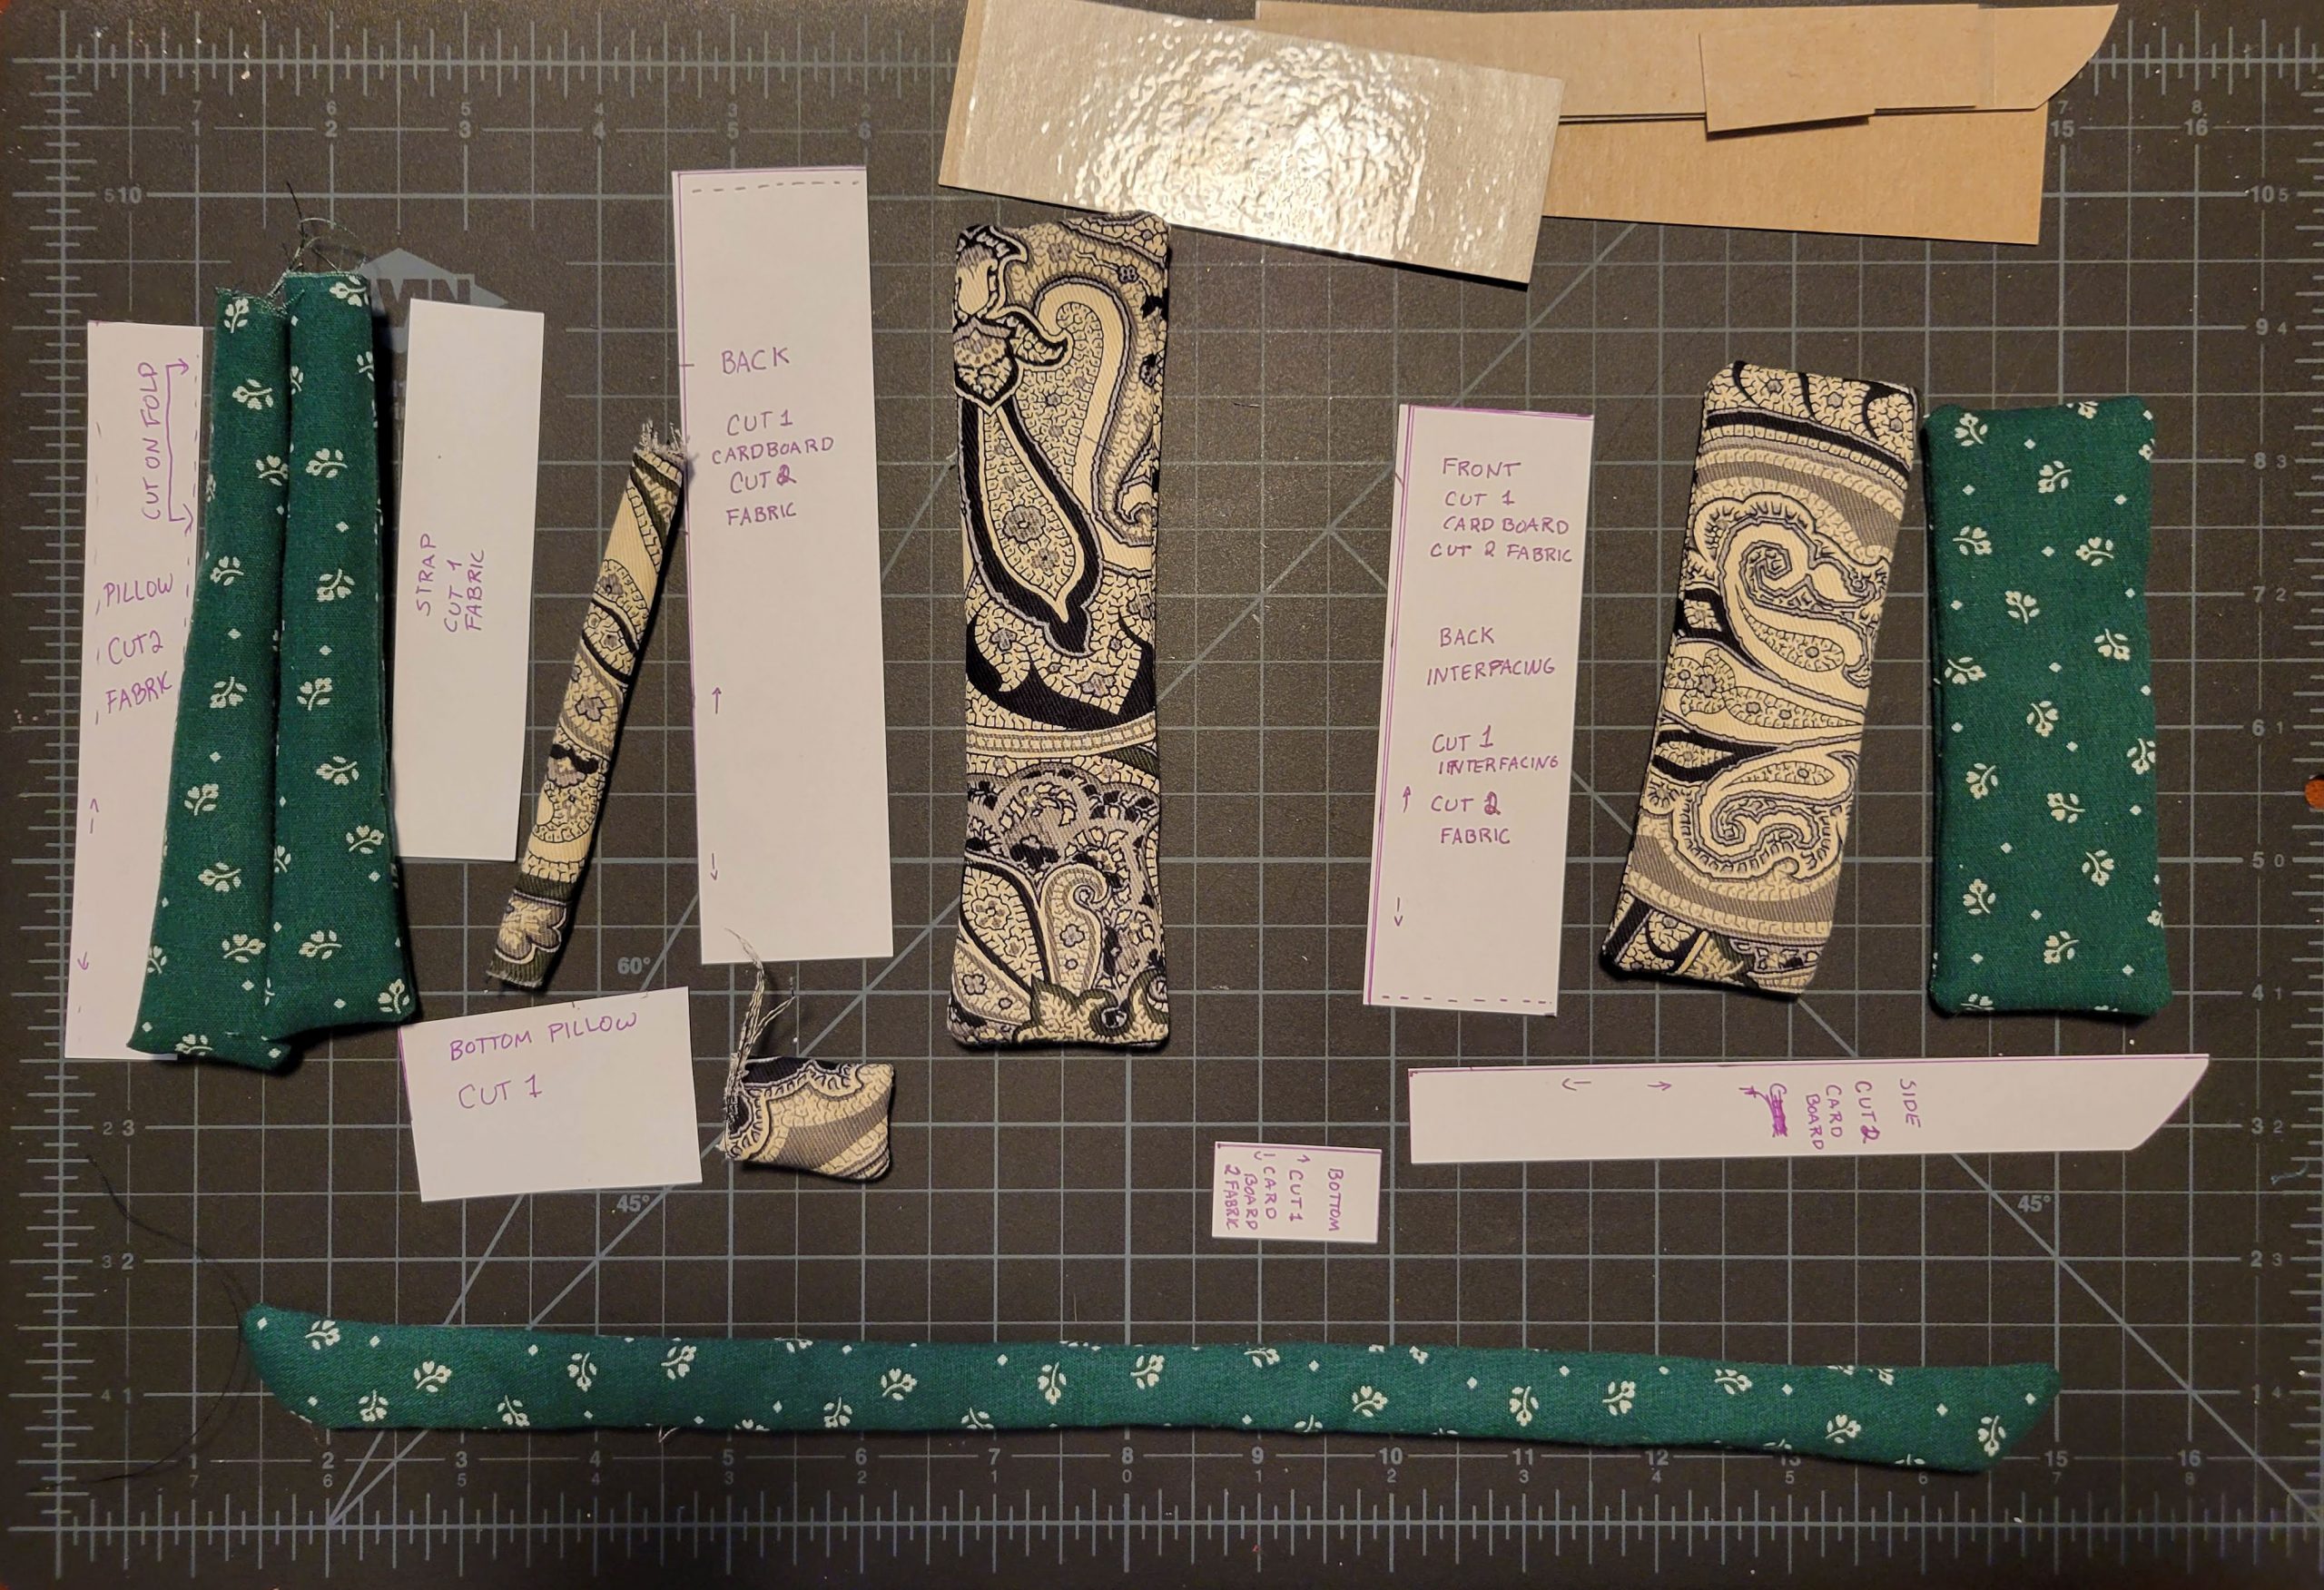
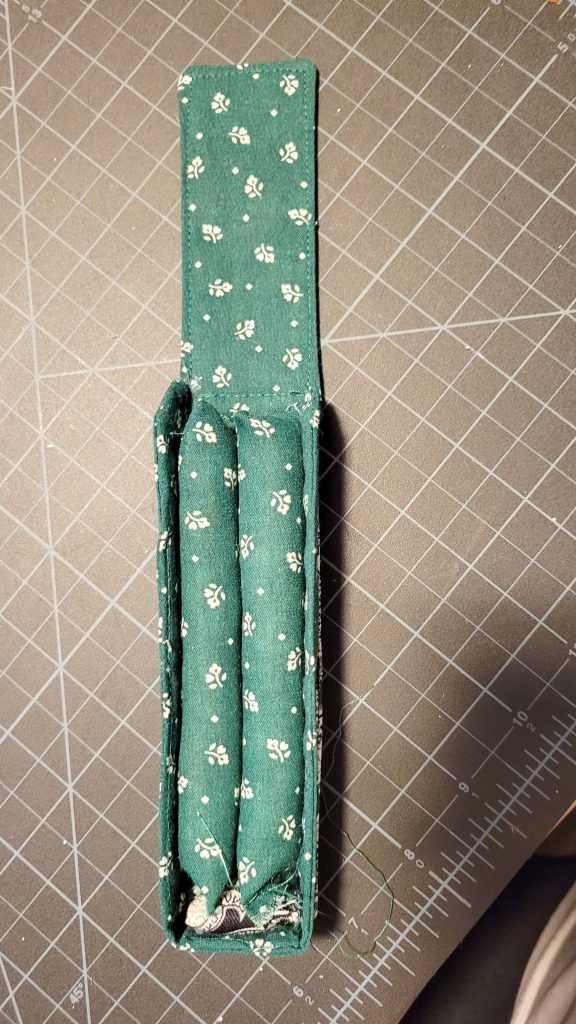
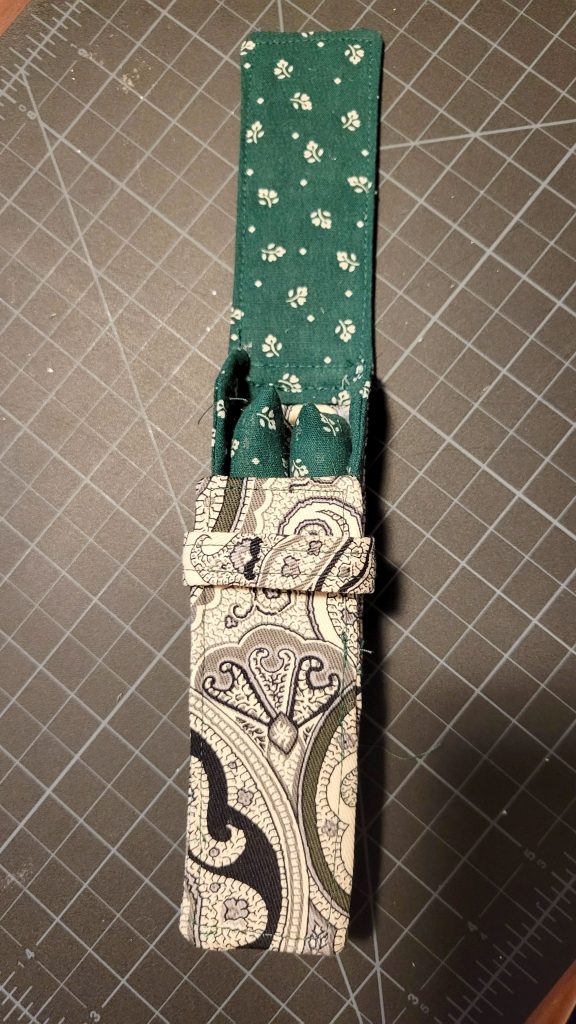
And some finished examples:


Supplies
- Fabric: fun patterns or simple colours, fat quarters are more than enough to make these. I started by using scraps of fabric from other projects. I also like to coordinate and mix/match patterns for different parts of the case.
- Board: I use the thin cardboard that comes when I order stamps, but, to make it sturdier, I laminate it. It must be as thick as possible while still able to be put through a sewing machine.
- Glue: I’m still trying to find the perfect glue. PVA doesn’t hold extremely well, but is the cleanest and fastest. CA glue holds well but is messy and can be rather ugly. Obviously the answer is some sort of fabric glue.
- Thread: To match the fabric
- Sewing Machine: Or, to do it by hand, a thick needle and some pliers.
- Stuffing: For the pillows
- Interfacing: It’s the best thing to use for the front flap of the cover because it’s stiff but not rigid. But it’s possible to forego this entirely I suppose. There are many thing that could be used, such as quadrupling the fabric.
- Iron: As with all projects of cloth, this is a pretty unavoidable necessity.
Process
- The interfacing and cardboard pieces should be cut exactly to size, but the fabric needs about 1/4” seam on each side. Note the side/bottom section which I cut only one piece of fabric, but three pieces of cardboard.
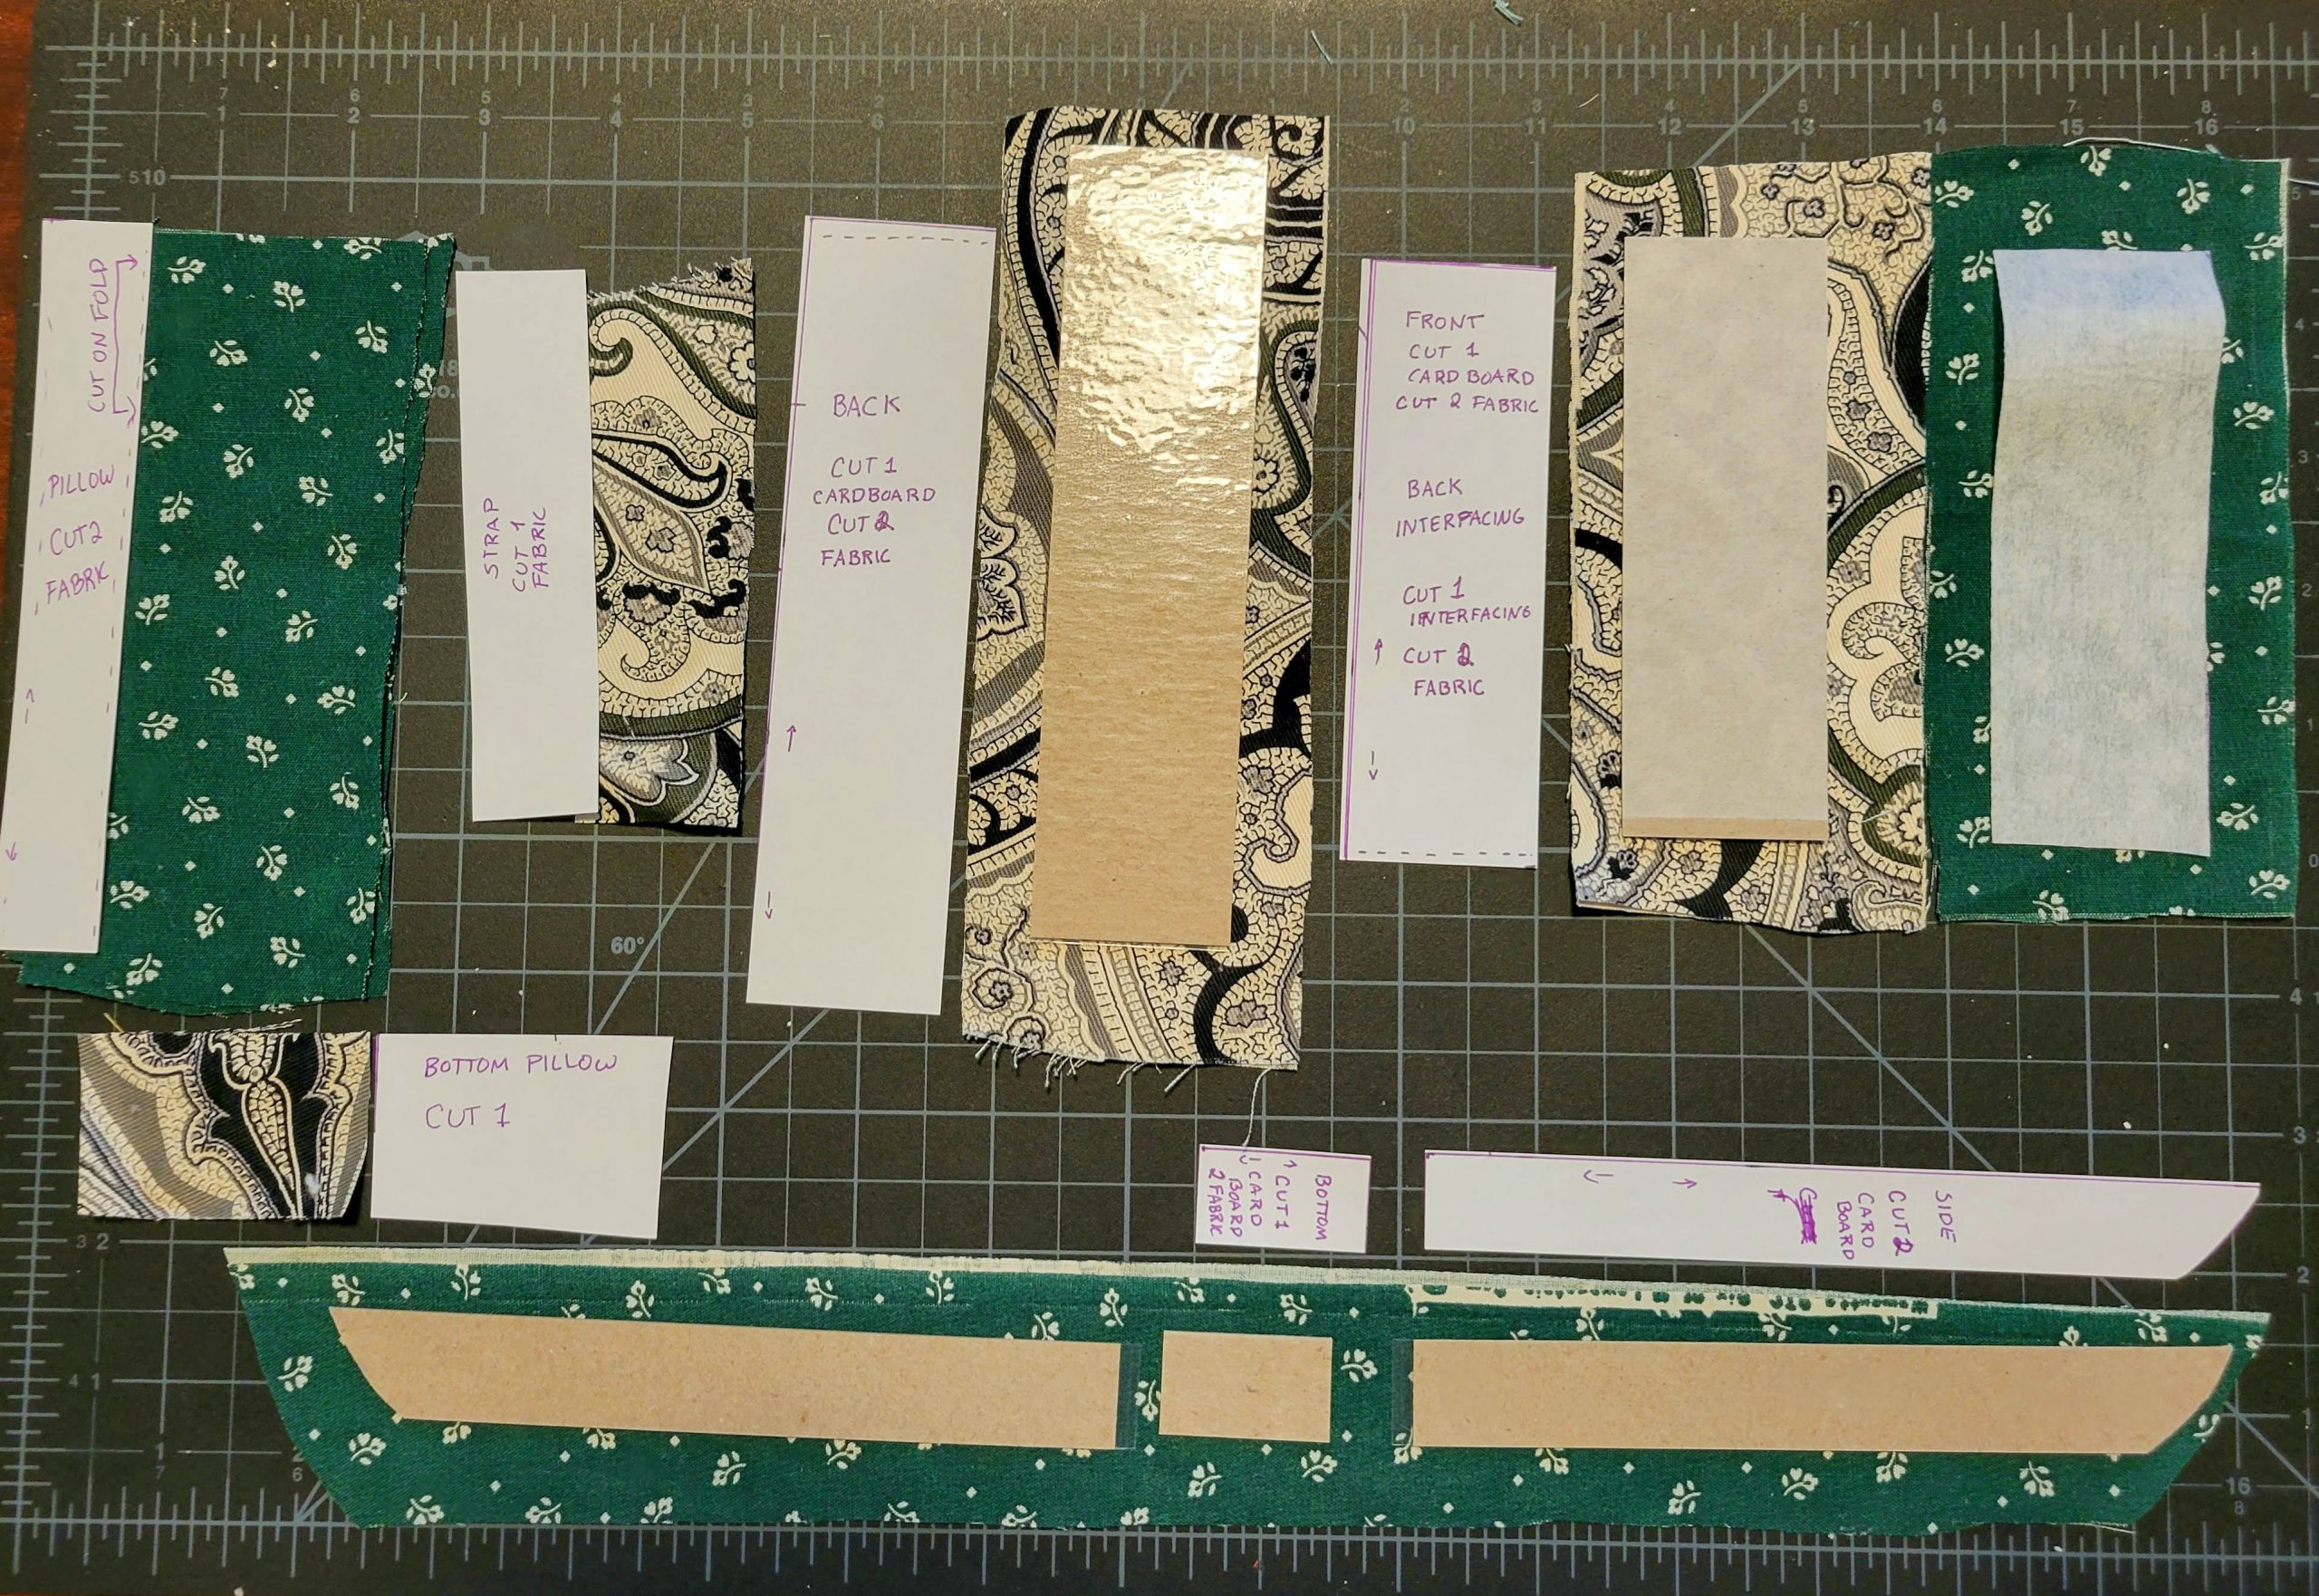
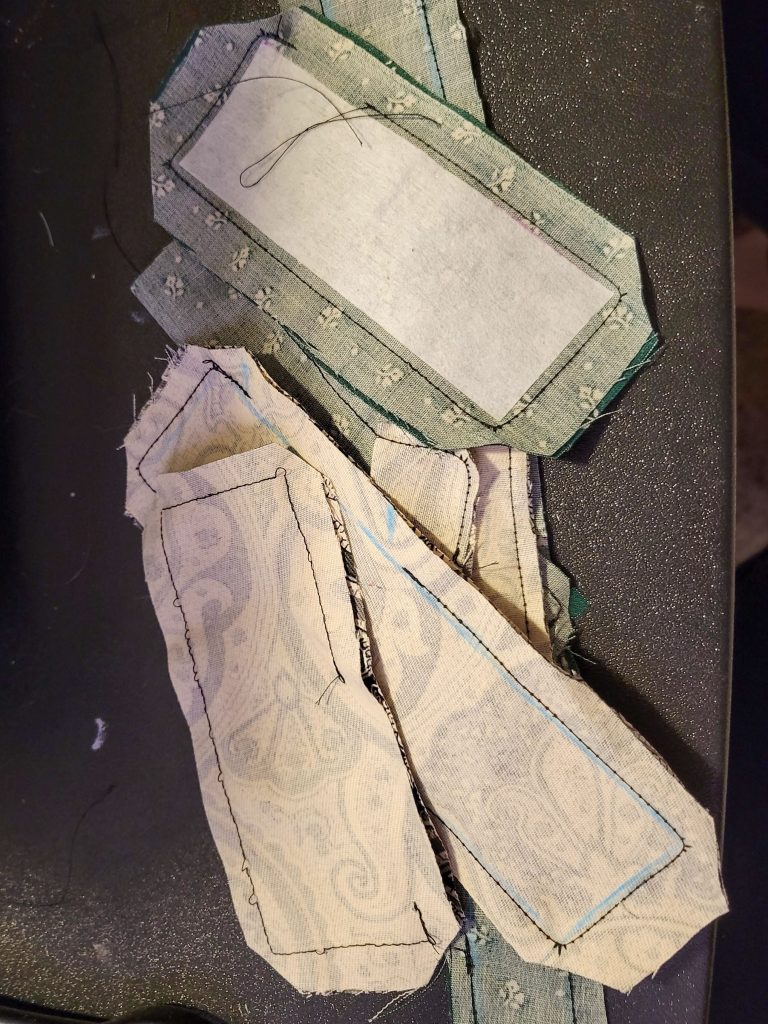
2. With right sides facing, I pin the fabric together and then trace the cardboard to make sure I do not sew the pieces too small. Leave an opening in the SIDE of each piece, which allows you to sew the corners at the stage. Otherwise, it will be a mess. Make sure the unsewn section big enough to fit the cardboard inside. The interfacing, if bondable, should be ironed on during this stage.
3. Here, everything is sewn together. Notice that all the corners are sewn. My openings should have been even bigger (and my sewing machine should have been serviced, but that’s neither here nor there). The corners have also been clipped at this stage. Later, I trimmed the seams down a bit as well.
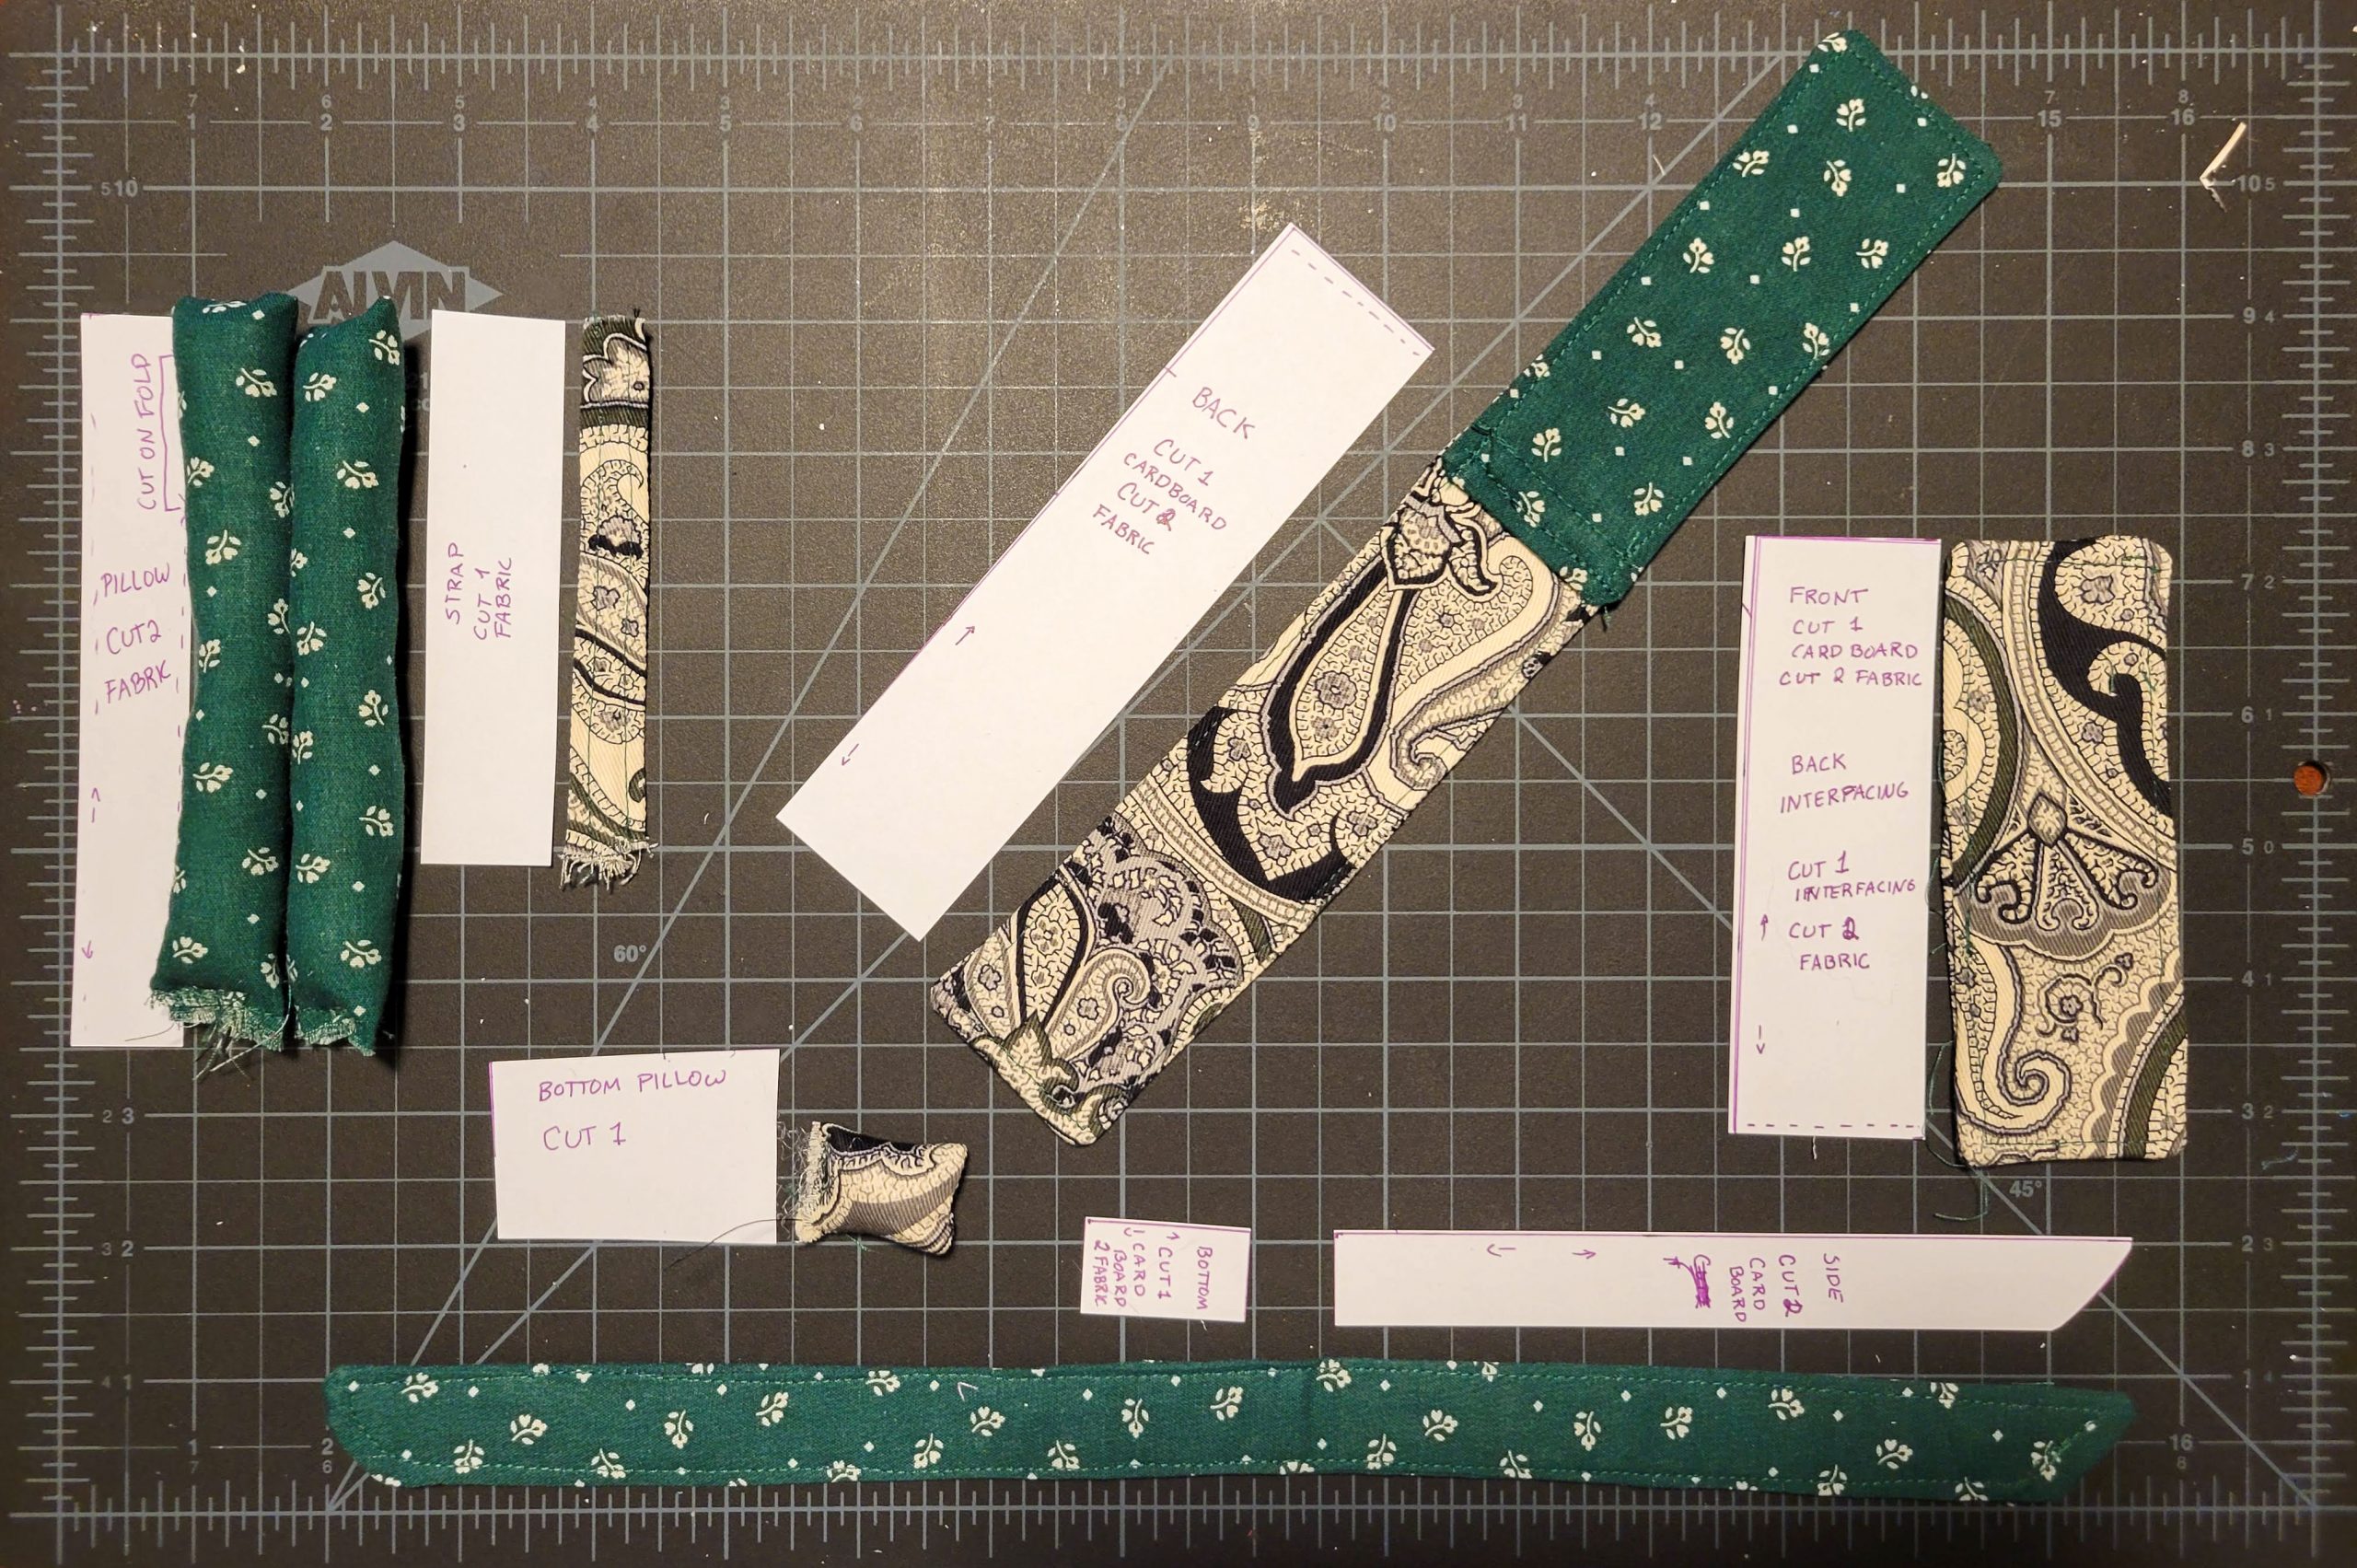
4. Turn everything right-side-out and iron anything that isn’t a pillow. Turn the seams of the openings inwards as you iron. Now is when we slide the cardboard in to the pouches. It’ll take some finagling.
5. Do some decorative and practical top-stitching. You will be sewing through fabric, seam, and cardboard. It’s nice to use some complimentary thread colours at this stage. For the pillows, add the stuffing of your choice and close the bottom seams. It doesn’t have to be too pretty since they won’t be seen. The strap should have two lines of top stitching with the seam in the back. This is also when you sew the flap and the back together.
6. Assemble the casket. This is when it is time to use the glue. As I’ve said, fabric glue would probably be best. You may find here that the pillows are too firm, so place everything nicely together before gluing to make sure. You can easily rip out the bottom stitches and remove some stuffing. The strap should be wrapped and glued to the back of the front section before gluing the front to the sides/bottom.
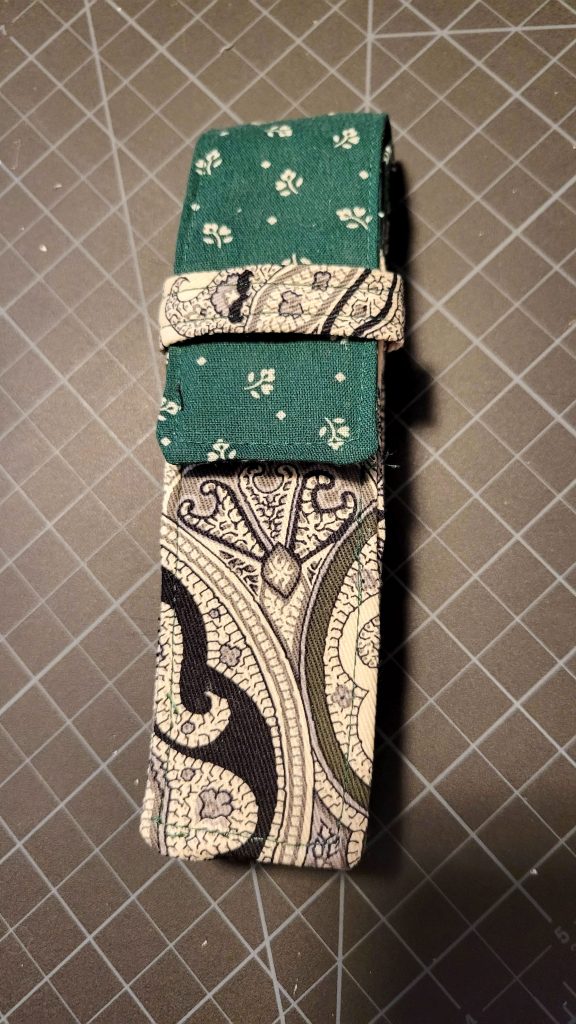
7. Wait for the glue to dry and give your pens a cozy home!


Those are so pretty! And, I love the name! I have all of my pens in a single case, but I love this idea.
Thank you! I have my pens scattered all over the place haha. But for the few “special favourites” I keep them in these cases.